Back in a former life I was a booking agent, and the hardest thing I dealt with was trying to encourage experienced Eastern whitetail hunters to get ready for their first Western hunt. Actually, “experienced” is a nice euphemism for “hardheaded.” I sent them a nice booklet that I had worked very hard on, explaining what to expect and how to prepare. Nobody read it. They all thought they knew everything already.
They didn’t.
Many had never shot more than 100 yards at game, and the wide-open spaces panicked them. I had several experienced Eastern hunters freak out the first time they shot at an antelope, holding 2 feet over the back of a buck at 250 yards. More than once I watched guys shoot all their ammo, go to town to buy more, then shoot all that, often with nothing to show for it. Of course, it was always my fault.

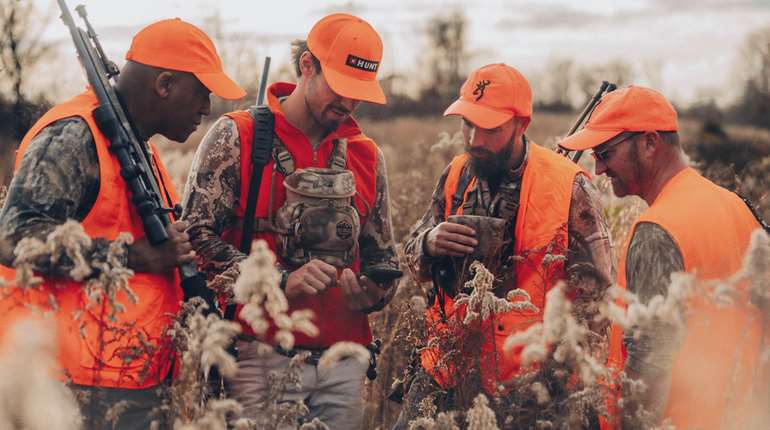
I am no longer in the booking business (thank God), but when my uncle, Butch Towsley, and his friends asked for some shooting help before a DIY Montana elk hunt, I was surprised. They are in their 50s, 60s and 70s. They are hardcore, lifetime hunters. They are the kind of guys who rarely ask for help. I was a little worried about that “old dog and new tricks” thing.
They are hunters, not gun guys, and I wanted my uncle and his friends to experience a successful hunt. So, I worked out a plan to help get the guns and the hunters ready for their first Western hunt.
I think the approach would be very helpful for anybody planning any hunt where the possibility of a longer shot is high, or for anyone simply wishing to improve his rifle skills.
The Gear
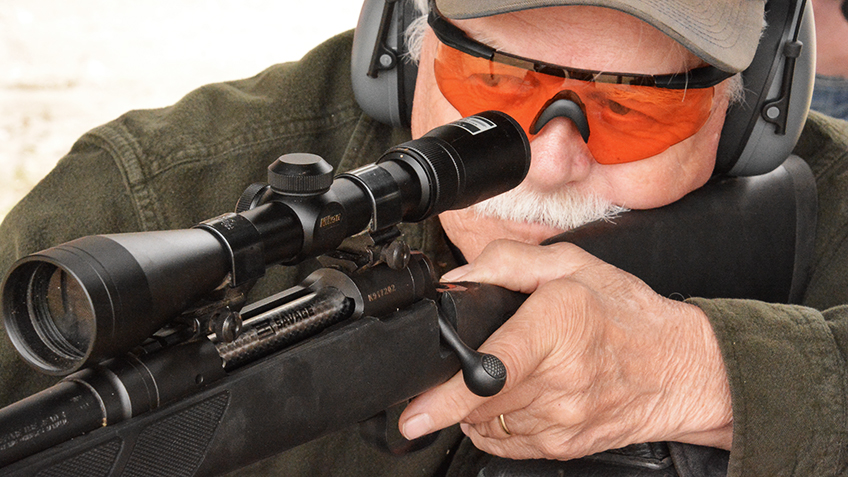
Make sure you have the right equipment. Harold Hunter prowls the thick stuff in Vermont and Maine, where he often measures his shots in feet. He is good and has a reputation for bringing home big bucks every year. His rifle? A Remington Model 7600 pump-action carbine in .30-06 with an 18.5-inch barrel. His scope was an antique Bushnell made back around the Kennedy administration in an ultra-high, see-through mount. It’s a great whitetail rifle for thick cover, but not the best choice for elk hunting in open country. The short barrel limits velocity, the tough trigger makes precision shooting difficult and the scope and mount are sins against humanity.
These are all blue-collar, retired guys with limited incomes, so we tried to make it work. But after the scope fell apart when we tried to adjust it, Harold decided a new rifle was a good idea. He picked up a Savage LH Model 111 bolt-action in .30-06, and I mounted a new scope on the rifle. The rifle is a tack-driver. Harold was hitting targets out to 300 yards in no time.
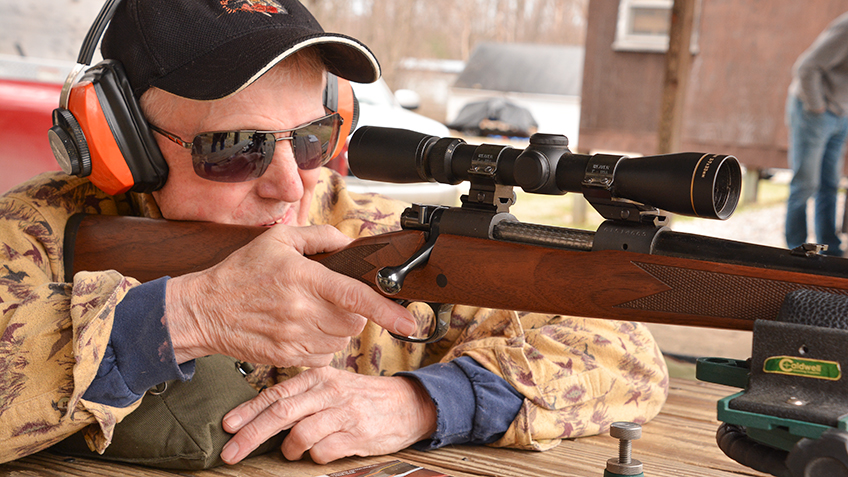
Guy Carruth, at my suggestion, brought to the range a .300 Weatherby Magnum he owned but rarely shot. He struggled with that rifle. The next time he brought a beautiful classic, a Remington Model 725 .30-06 that was his dad’s. With it, he was shooting groups so small it was hard to see individual bullet holes. Could we have worked to teach him to shoot the .300 better? Sure, it’s just a matter of smart practice. But Guy had tremendous confidence in the .30-06 and that’s important. In contrast, Jim Benson brought a .340 Weatherby he had used for years. It served him well on the hunt. It’s all a matter of getting to know your rifle.
Another approach I suggested to Butch, who also had only a 760 pump-action carbine, was to buy a rifle for the hunt. There are a lot of inexpensive rifles on the market today, and most of them shoot very well. I suggested he buy something like a Ruger American or Mossberg Patriot in .30-06 or even .300 Win. Mag. To save money, we could mount the scope he had on the Remington 760. He could use the new rifle for the hunt and if money was an issue, sell it for a little less than he paid for it when he got back home. The “rent” would be an inexpensive way to ensure he had a proper rifle.
When his girlfriend offered to let him use her Model 70 Winchester in .270 Winchester the problem was solved. In my never-humble opinion the .270 is a bit on the light side for elk, but with good ammo and good shooting it will work fine.
My point is, you are spending all that money, time and emotional treasure on a hunt so don’t take the wrong rifle when you can find one better, often for less than what you paid for the hunting license.
Make sure the gun is tuned up and ready to go. If it’s a used rifle, clean the bore of all copper fouling. This can take some time, but keep at it with a strong copper solvent until the patches come out without blue stains.
Pull the stock off the gun and check for cracks or other damage. Seal any raw wood with polyurethane to keep out moisture. If the barrel is floated, make sure you can pass a dollar bill between the barrel and the stock for the full length of the stock.
It helps to have a trigger pull of 3-3.5 pounds. If the trigger is adjustable, have it adjusted by somebody who knows how. Install the stock and torque the screws to the proper tightness. A little dab of blue No. 242 Loctite helps keep them in place.
I like to pull the scope and remove the base screws one at a time. Put on a dab of blue Loctite then torque them to the correct tightness. Re-install the scope with the ring screws Loctited and tightened correctly.
Use a bore sighter and watch through the scope as you run the adjustments through their full range. This checks that the internals of the scope are working correctly. End by centering the reticle on the bore sighter’s center.
If you are not comfortable doing this, take the rifle to a gunsmith. The small cost is well worth it to head off any potential problems before the hunt.
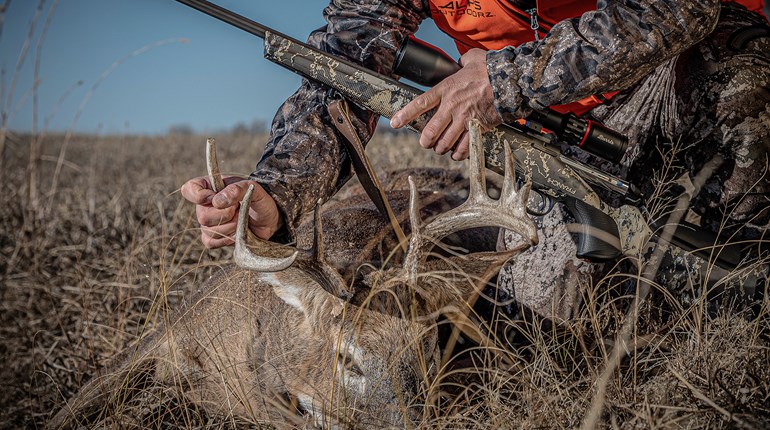
Buy good ammo and lots of it. Make sure you pick a premium big-game bullet in a weight that is appropriate for the animal you will be hunting. People complain about the price of ammo, particularly for practice. But it’s the only physical connection you have with the game you hunt. The entire outcome of the hunt depends on one bullet and how well you deliver it to the game. I am always puzzled when somebody shows up in camp for a very expensive hunt with cheap, bargain-shelf ammo.

I recommend you practice with the ammo you will use for the hunt. Sure it’s expensive, but it’s better to learn the holds for long range with the exact ammo you will use on the hunt. If you practice with one ammo and then shoot another on the hunt, all your data may be off. Also, any problems with the ammo-and-gun marriage will show up on the shooting range, not during the hunt. Sometimes a gun just does not like particular ammo and won’t shoot it well. It’s best to find that out before the hunt.
Five hundred dollars spent on ammo is a fraction of the total cost of the hunt, but might influence the end result more than anything else you do. A quick check on the Internet shows Barnes Vor-Tx .30-06 180-grain TTSX ammo on sale for less than $40, so $500 buys about a dozen boxes. Keep two for the hunt and practice with the other 10.
The Range
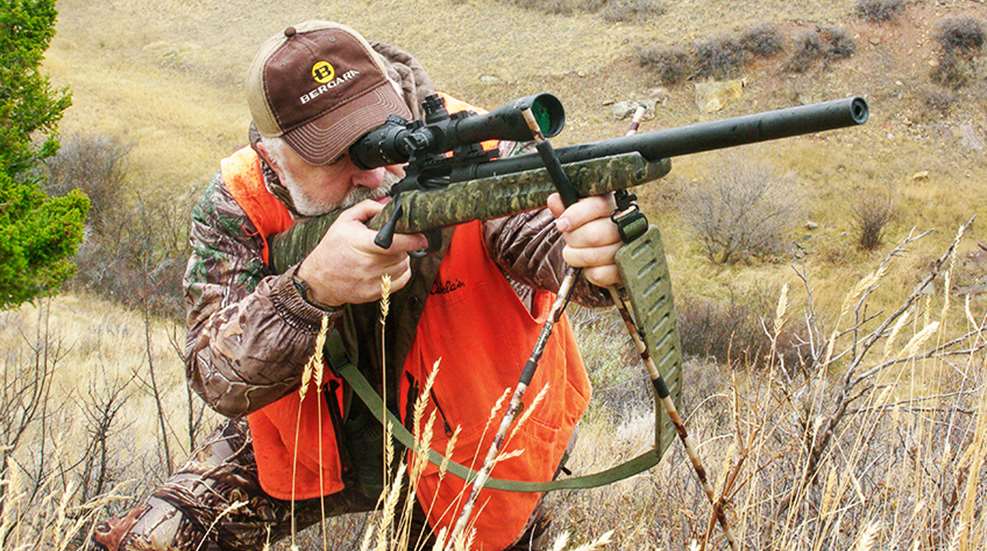
Zero the rifle from a solid bench rest. Use a sandbag or other proper rest. Always use a front rest under the stock’s fore-end, never the barrel. Also, and this is important, always have a toe bag or sandbag under the butt of the gun. The rifle should be rock steady sitting on the bags. The reticle should be centered on the target and you should not be
holding any weight. That’s the job of the two sandbags.
Improvised rests can affect the point of impact and the group sizes. For example, I was on a hunt recently and wanted to check my zero after the airlines had the rifle for a day. We didn’t have a rest at the shooting bench, so I used a block of scrap wood with my insulated gloves piled on top. The rifle was stringing vertically quite badly. I built the rifle myself and knew it was extremely accurate with this ammo. I was frustrated and used up a lot of ammo before calling a time-out. It turns out the squishy gloves were the culprit. Once I came back with a proper rest the rifle shot like I expected.
For Western big-game hunting with a modern bottlenecked cartridge, I suggest a 200-yard zero. This puts the point of impact at 100 yards about 1.5-2 inches high, depending on the cartridge. At 300 yards the point of impact will be 5-10 inches low, again depending on the cartridge. That means the hunter can hold on the animal out to 300 yards and expect a killing shot. With most cartridges, I recommend holding a third down from the backbone for 300 yards, always “on hair, not air.”
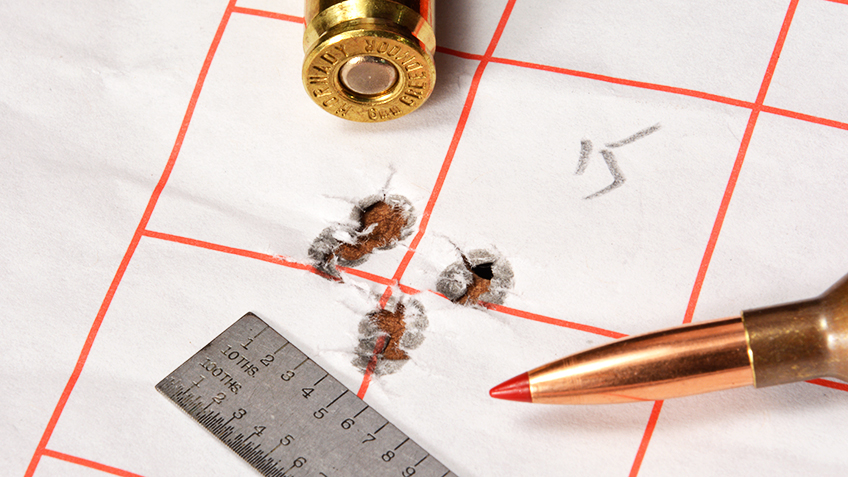
Shoot a group. After letting the rifle cool, shoot a careful group on a paper target at 100 yards. Three shots are fine, five shots are better. If it’s round and measures no larger than 1.5 MOA the rifle is ready. The group should be precisely centered at the expected point of impact. Be fussy about the zero because everything else you do will be predicated off that zero. Let the rifle cool, fire another group and repeat until your zero is perfect.
Do not make scope adjustments based on one shot. You will wind up chasing bullet holes all day, which will eat up your ammo and make you grumpy. Shoot a group and make adjustments from the center of the group.
It’s common to read that shooting off a bench is a waste of time in terms of practicing your rifle skills. I completely disagree. This is where a shooter perfects the basics of sight picture, breathing and trigger control. We have eliminated the shooter from holding the rifle’s weight, so he can work on those fundamentals.
Once he has them mastered, he can then move on to other shooting positions where a shooter’s skill becomes a bigger factor. Without previously mastering the fundamentals, a shooter is just wasting ammo. With the fundamentals learned, the practice from field positions teaches one how to shoot as well as he can from those positions.
Go long. Once the shooter is comfortable with the rifle and is shooting groups that are small and on the right point of impact, it’s time to stretch out a little.
The first stop is the 200-yard range, where you should confirm your zero. At 200 yards the point of impact should be exactly the same as the point of hold. Tweak the adjustments and shoot more groups until it is. Do this on a calm day with no wind.
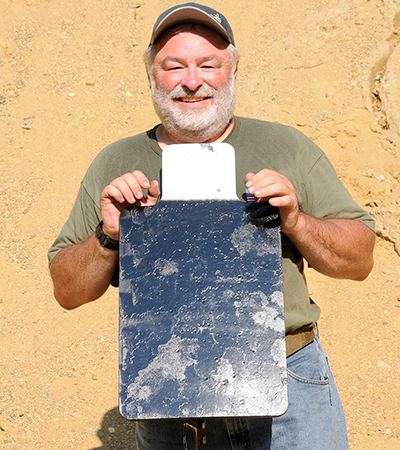
My club’s range stations steel MGM IPSC targets at various distances from 200 yards out to 500 yards. I paint them before every shooting session so we can see impacts through my Swarovski spotting scope. These targets have a small “head” that measures 7 inches wide and 6 inches tall.
"Until they see it with their own eyes, most shooters can’t believe how flat a modern rifle will shoot."
The first target is at 200 yards. To build confidence I had the guys shoot once at the center of the large target and with a good hit, move to the head. Two hundred yards was farther than most of these guys have shot a rifle, yet they all were making head shots every time they pulled the trigger.
We moved to 300 yards and I had them hold at the junction of the head and shoulders on the target. This put most impacts in the center of the steel target.
Until they see it with their own eyes, most shooters can’t believe how flat a modern rifle will shoot. After showing them, I tell them to trust their equipment, not their lying Eastern eyes that say, “It’s too far, hold over!”
After 300 yards bullets start dropping much faster and things get tricky. At 400 yards common big-game cartridges are dropping around 20 or more inches below the line of sight. At 500 it’s double that.
So we did some shooting using the hold-over method. I didn’t want to confuse the issue by getting into advanced long-range reticles or dialing up for longer shots. These are basic hunting rifles and scopes, so the logical approach is to hold over.
I figured the drop using an app on my smartphone. A 25-inch drop put the hold about 6 inches above the top of the head of the steel target. To make it easy, I suggested holding “one head” above the target. Everybody hit the target, usually on the first try. Then we repeated the feat at 500 yards where the hold was much higher and the success a bit more elusive.
The lesson I wanted to teach is there are limits. Making first-shot hits out to 300 yards is fairly easy with a modern hunting rifle and scope, but beyond that the bullet drops increasingly faster and it becomes progressively difficult to hit any target.
My recommendation is the same as it’s always been: Unless you are a very experienced long-range shooter, limit your shots at unwounded game to 300 yards. But practice and know how to shoot farther for those times you cheat or are trying to stop a wounded animal.
Lose the bench. After a few range sessions on the shooting bench and sandbags it’s time to leave them behind. I recommend going back to the shooting bench now and then to polish the fundamentals and anytime you are struggling with field position.
We worked with shooting sticks to support the rifle while sitting on the ground, both with and without back support. Also from prone, sitting and leaning on a tree, or, in this case, a column supporting the roof over the shooting benches. Standing is old hat to these whitetail trackers, so we skipped that because of limited time. Unsupported kneeling is unstable and generally not a good hunting position.
It’s important to understand that with many field positions it is impossible to keep the crosshairs perfectly still on the target. Most inexperienced shooters try to snatch the trigger as the crosshairs wobble across the target. That is a sure path to a miss.

No matter the position, there will likely be a bit of wobble. Don’t try to make your reticle rock-solid still as you did on the sandbags; you can’t. Rather, try to control the wobble to as small a circle as possible with your point of aim in the center of that circle. Slowly increase the pressure on the trigger while maintaining that cone of wobble on the target, and when the gun fires you should have a good hit.
Practice shooting from field positions at a 100-yard paper target. You already know what to expect from your rifle at that distance. Don’t be shocked to find your groups are larger from field positions. The idea of this drill is to work toward shooting the best you can from each position. The target and groups give you a way to measure your progress.
You will find that the degree of difficulty varies with each position. From prone and rested you should be able to nearly duplicate the groups off the bench. Standing? Not so much. The rest of them fall someplace in between. This not only builds skills but it also shows you the difference in the various field positions, so you can make good choices in the field.
Don’t just keep shooting paper at 100 yards. Once you have it dialed in from field positions, mix in some reactive targets at various ranges. Steel targets are great—they ring, the spotter can see the hit and some even move. But don’t worry if you don’t have them. Rocks, milk jugs full of water, coffee cans, scrap wood, old cement blocks or bricks—they all make reactive targets. Use your imagination and clean up after you are done. Don’t stick with the 100-yard intervals; place the targets randomly to simulate hunting situations.
Hanging clay pigeons at long range can make a challenging target. Drive a stake in the ground and use a nail to hang the target. When you are dialed in you probably won’t miss many at 200 yards. Three hundred will be tougher, but if you can master hitting those 4.3-inch targets from a field position an elk’s chest will look huge.
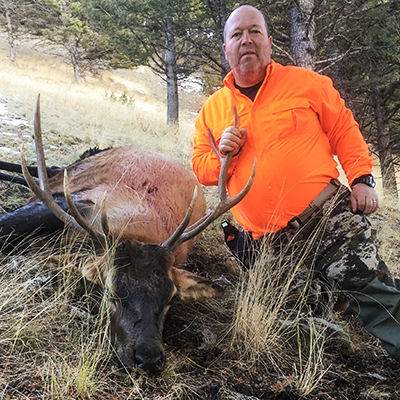
So how did the guys make out? Three of the four had shots at elk, and all three of them connected.
Practice pays.
Most Popular