Hunting is never just about the food. Even in ancient times, when wildlife was the only source of protein, hunters kept trophies. We keep the antlers, hides, feathers and other animal parts because hunting is so much more than just eating. We honor the game though these trophies and we keep them to remind us of the hunt. It's important to explain this to new hunters.
In my youth, most every outdoor magazine carried a small ad for The Northwestern School of Taxidermy correspondence course. I was in junior high school when I signed up.
The first book had instructions on how to mount a bird. They suggested a pigeon. Somebody mentioned a farm in the next town might have one, so I jumped on my bicycle and headed that way. They didn’t, but the farmer gave me a mangy looking chicken out of pity for the long bike ride. What the heck, a “bird in hand,” right? That was Saturday, and I waited until after my parents left for a night out before I spread newspapers on the kitchen table and went to work.
It turns out chickens are violently opposed to becoming taxidermy experiments and are kind of jerks about it. They become quite tenacious and fight viciously once they realize they are about to be stuffed. They are also covered with lice, at least this one was. My mother came through the door about midnight to find me exhausted and her kitchen painted with feathers, chicken droppings, blood and lice. She was pretty adamant that I abandon the taxidermy thing immediately. Since the chicken was looking pretty rough by then, I agreed.
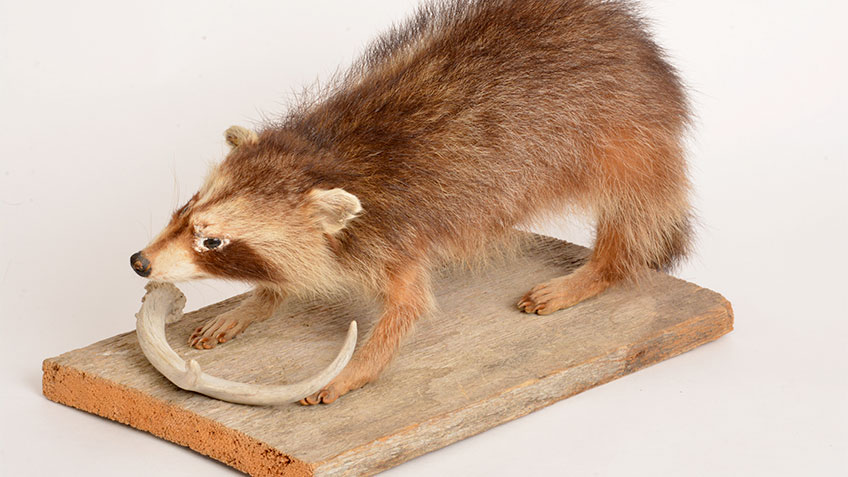
A few days later I was hiding in the woods, still waiting for things to calm down, and I shot a raccoon. I mounted him and gave him to my father, hoping he would put in a good word for me with Mom. I still have that trophy to this day. It’s by no means perfect, far from it actually, but it was my first completed taxidermy project.
It took longer than it should have to discover that I lack the artistic talent to be a great taxidermist. Based on the current cost of taxidermy work, I wish it wasn’t so. I might have been rich! These days, I turn over the big jobs to the pros, and I have a lot of professional mounts in my office. But I still like to do it myself now and then. There are many ways to create unique trophies of the hunt. Here are a few suggestions for do-it-yourself projects to share with new hunters. Be assured, none of them involve chickens.
Tan a Deer Hide
A deer hide can be tanned hair-on for a wall hanging, rug or draped over the back of a chair. I have a couple of hair-on tanned whitetail hides in my office hanging over a quilt rack, and they add a decorative aspect to the office. They also double as photography backgrounds.
Or you can tan it hair-off to make buckskin leather. This can be used decoratively or to make clothing or other useful items. I was recently on a hunt with a guy who made his own backpack from deer hides. It worked every bit as well as my modern camo, nylon pack and looked much cooler.
If you are ambitious, you can do it the ancient way by brain tanning. A deer’s brains contain an oil called lecithin, which works as a natural tanning agent. The process is labor intensive and requires hours of working the skin to make it pliable. In times past some Native Americans chewed on the hides to make them soft and pliable, which you are welcome to try. After brain tanning, the hide is often smoked near a fire to provide color, some waterproofing and to keep it supple after it gets wet.
Or you can buy one of the home tanning kits available today. These are still a lot of work, but easier than brain tanning and they are a lot less wear and tear on your dental work. Just search "home tanning kits for deer" and a world of options will pop up online.
Remember, the key to a good outcome is to prepare the hide properly. Spend extra time to clean and prep the hide before tanning and you will be rewarded with a good outcome.
Boil a Skull
Well, it’s more like simmering, but either way, this is the traditional method to clean a skull. A turkey fryer works great for this. If you are doing anything with horns or antlers, do not boil them, just the skull. Rig something to keep the antlers out of the water. Horns should be removed and cleaned.
The idea is to cook the meat and tissue until you can remove it from the bone. Before starting, cut away all the tissue you can; the cleaner the skull, the faster the process. The judicious application of a pressure washer can speed up this process, but be prepared to be covered with gunk. You can wear a raincoat or just tough it out, but either way you will need a shower afterward.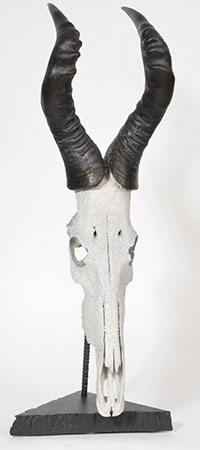
Simmer the skull at the lowest heat and for the shortest time necessary. Figure two or three hours for a bear or a large deer skull. The process is faster if you add powdered detergent or sodium carbonate to the water. Every half hour or so remove the skull and clean off all the gunk you can. Use a knife and wire brush to clean away tissue, and a wire to poke into the holes. Flushing with a garden hose will remove a lot of gunk from inside the skull.
You want to boil as little as possible, as too much makes the bones separate at the seams and causes other problems like brittle bones and teeth that may crack later.
Speaking of teeth, I decided to boil the skull of one of my bears while I was stacking my winter firewood. I was multi-tasking before the word was invented. I had several cords of wood stacked by the time the skull was finished. For no good reason I can remember, I dumped the water on the wood pile. That’s when I discovered bear teeth fall out after boiling. They all flushed deep into the woodpile I had to tear it down to find all of the teeth.
Once the skull is done, soak it in white gas (Coleman Fuel) overnight to degrease it. I am told a strong solution of Dawn dishwashing liquid might work, too. Use strong glue to replace the teeth. I like the natural bone color, but if you want a whiter skull, there are available kits to bleach it, or you can make your own bleach using high-strength hydrogen peroxide.
Artistic Skulls
Once a skull is clean and degreased you can add an artistic touch by painting or dipping. I have seen some wonderful paintings on skulls, but for that you need talent. So I am out. My preference is to spray it with primer and follow that with a stone texture paint.
You can also hydro-dip using multiple cans of spray paint and a water tub for a “tie-dyed” looking result if that’s what tickles you. There are lots of videos on how to do this on the ’Net.
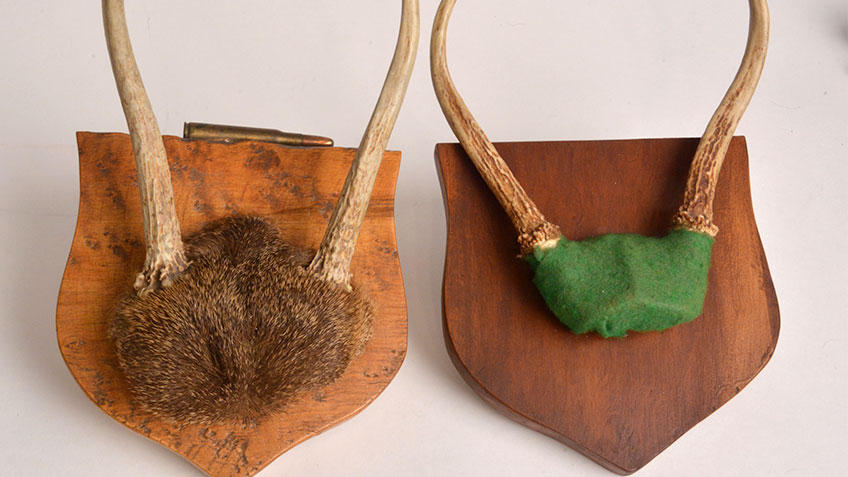
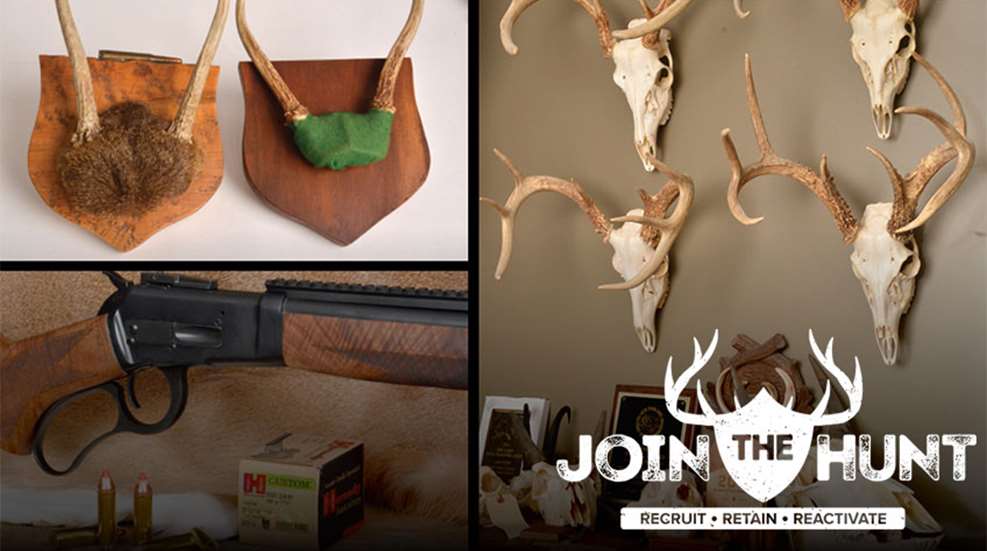
Mount the Antlers
Perhaps the simplest way for deer antlers is to clean the skull plate and stretch and glue buckskin or felt over it to cover it completely. I prefer a bare-bones approach, but some folks like to build up the skull with Bondo (used for auto body work) or plaster of Paris before fitting the felt.
Another approach is to work the skin off the skull, but leave it attached to the antler bases. Leave the skin larger than the bone it will cover. Clean up all the meat and tissue, then coat the skin with Borax and stretch it back over the skull, sewing it in the back.
Fit the antlers to a plaque, which is easy to buy or make. I fill the brain cavity with Bondo before fitting the felt and imbed a hanger or screw anchors in the Bondo before it dries. I suppose an epoxy-like gun stock bedding compound like Brownells Acraglas would be stronger, but Bondo has never let me down.
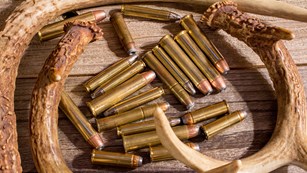
I like to glue the tag or hunting license to the back to identify the year. I also glue the cartridge used to take the deer to the plaque.
Now is the Time
The weather is getting colder. Hunting seasons are winding down. This is a perfect time to take up one of these projects with the new hunters you have chosen to guide.