Processing your own deer is easy and fun. The quality of the resulting meat is outstanding, and it saves the cost of having it commercially processed. You don’t need a lot of fancy tools or a butcher shop, just a place to hang the deer for skinning and quartering.
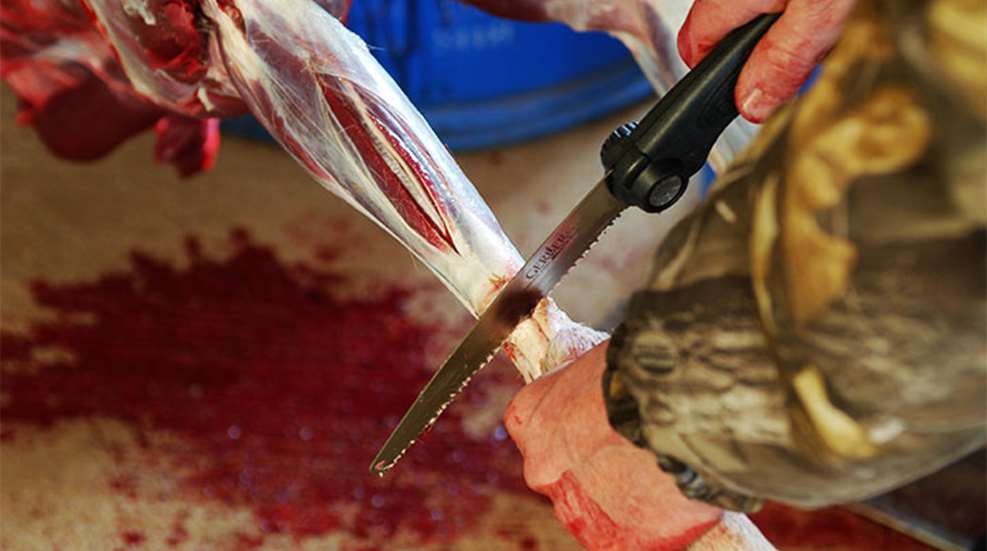
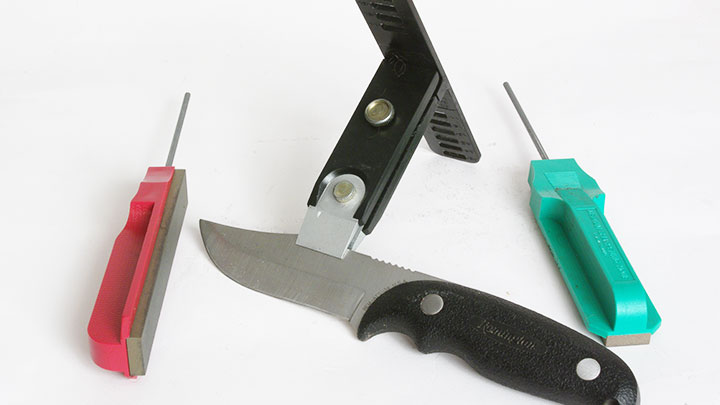
For tools, you’ll need a knife or two and a butcher’s steel to keep them sharp, a saw is handy to have (although it’s not mandatory), and a cooler or tarp to keep the meat clean. You’ll also need a gambrel to hang the deer. I made mine in my grandfather’s garage back in the 60s when I was still in Junior High School. It’s handled hundreds of deer and a few moose over the years. Commercial gambrels are not all that expensive and work fine. In a pinch, I have done a lot of deer by putting a green branch through the legs and tying the legs in place with cord. A rope is tied to the center and locked in place with more cord.
You’ll need a place to hang the deer. Make sure it’s high enough to allow you to raise the deer to a comfortable level, even when working around the neck. A come-along to raise and lower the deer is helpful, but a strong back and a rope will work, too. I wrap the rope around a tree and tie it off to hold the deer.
As soon as you shoot the deer, gut it and cool the meat. A lot is made of hanging the carcass to let it age, but that’s often a mistake. Hanging the deer in uncontrolled conditions will often do more harm than good and can cause the “gamey” flavor that so many people find objectionable. Unless you have a temperature-controlled place to hang it, it’s better for most hunters to process the deer as soon as possible after shooting it.
Cut the skin between the tendon and the bone on each of the back legs and insert the gambrel on a rope or chain that can be raised and lowered. Now raise the deer until the back legs are at a comfortable working level.
Your knife should be sharp. A dull knife not only creates a lot more work, but it is dangerous. Keep a butcher’s steel handy and as soon as you sense the knife getting a little bit dull, use the steel to bring the edge back. Remember when cutting deer hide that you should always cut from underneath. Cutting from the top cuts the hair and that loose hair is sure to get on the meat.
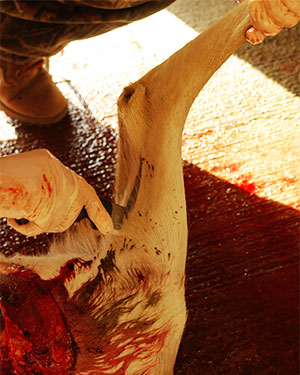
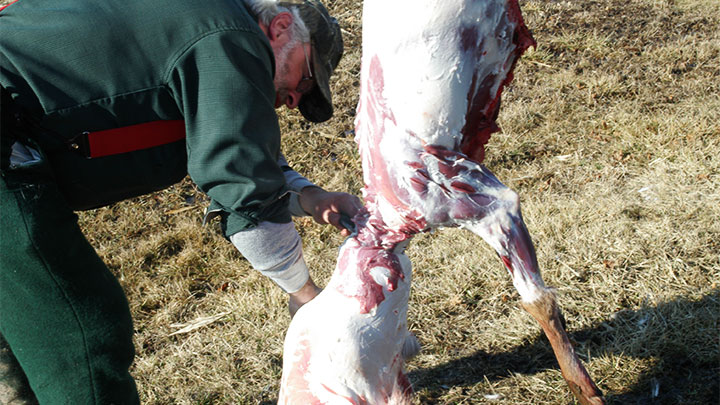
Starting just below the cuts you made for the gambrel, follow the ridgeline of hair formed where the white and brown meet and make a cut in the hide all the way to the anus on both legs.
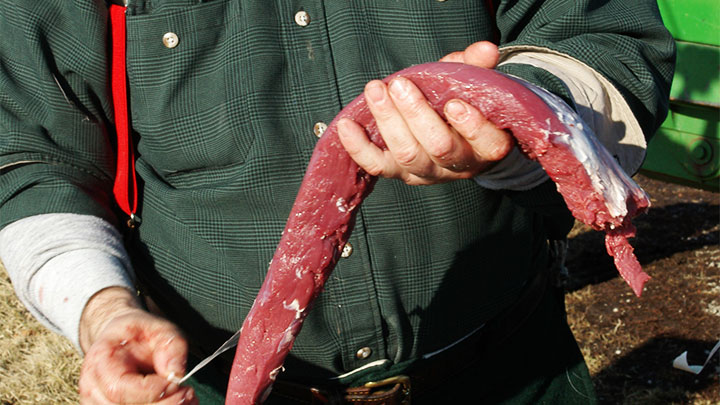
Now ring each leg at the point where you started the cut, again always cutting from underneath the skin. Be very careful not to cut the tendon. Begin peeling the skin off the deer by pulling on the hide as you cut it away from the meat. Use the “belly” of the knife to cut the connecting tissue as you pull on the skin. For skinning, I prefer a knife with a sweeping belly on the blade, like a drop point design.
When you reach the tail, you’ll need to cut through the cartilage. I usually just pull on the tail as I chop at the junction of the body with a knife, but you may wish to use a small hatchet. When you have the hide off the legs and have started down the torso, switch to the front legs.
Cut a ring around each of the front legs at the knee joint, then make a cut following the cowlick of hair up the leg to the armpit and continue the cut on an angle that joins with the cut you made when gutting the deer. Free the skin on the front legs by pulling and cutting.
Back at the rear, continue peeling the hide off by pulling and cutting. Often simply pulling down on the hide will free large sections, particularly if the deer is still warm. As you come to the shoulders work the remaining hide from the front legs.
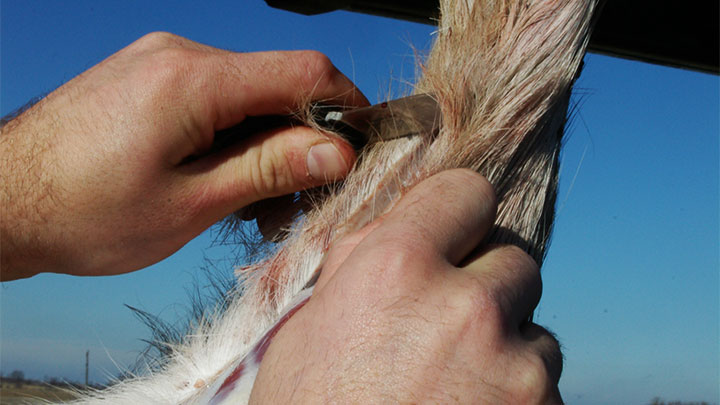
Continue skinning down the neck until you reach the back of the head. You may find it easier to raise or lower the deer as you are working to keep the work area at a comfortable level. If you’re not going to mount the deer, it’s much easier if you split the hide down the front of the neck. Again, cut from the inside out.

Remove the front legs, cutting a few inches back from the hide. It’s possible to cut through the joint with a knife, but it can be a bit tricky and troublesome. I much prefer to simply cut through the bone with a saw. There are lots of saws designed for field work on game. I recently bought a good butcher’s saw, but before that I used an inexpensive carpenter’s crosscut saw available at any home repair store for a few bucks.
Use your knife to cut through the meat on the neck close to the head and then cut the bone with the saw to remove the head. (In this age of chronic wasting disease (CWD), some hunters do not want to cut through the spinal cord and possibly spread the disease to the meat. In that case, leave the head and hide attached to the carcass.)
Grab one front leg and pull. It helps to have somebody hold the deer or pull the opposite leg as you do this. (Or they pull and you hold the deer.) Use your knife to cut under the leg (in the armpit) and shoulder where it meets the body. As you pull and cut, the leg and shoulder will come free from the body. Place the shoulder on a clean surface. I usually keep a clean plastic cooler to place the meat in, but a clean tarp or table will also work. A space blanket works very well in the field. Now, do the same with the other front shoulder.
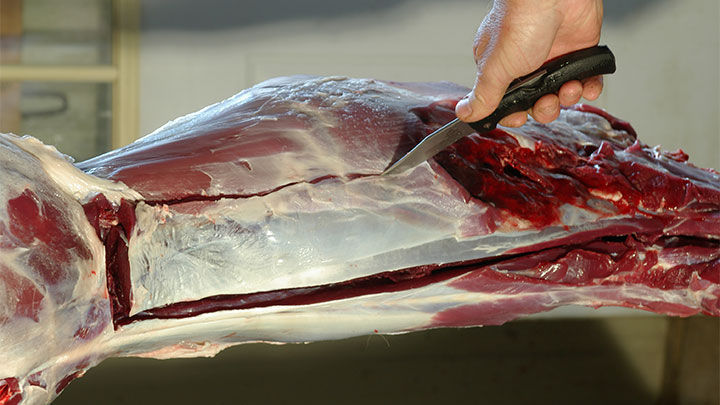
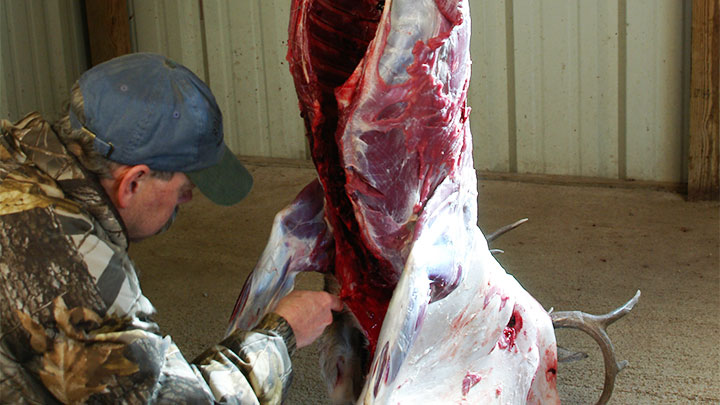
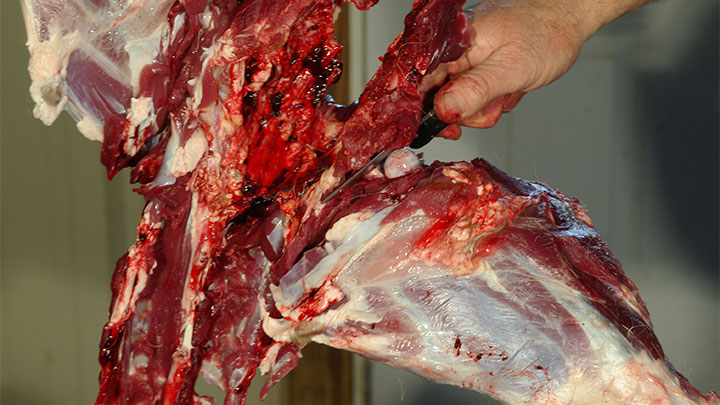
The backstraps are the long pieces of meat along the top of the backbone. Follow the muscle back to where it appears to end or merge with the hind quarters and make a cut 90 degrees to the backbone to define the end of the cut of meat. Now use the knife to follow the backbone as you cut the meat free from the spine. Turn the blade slightly to the backbone so that the edge rides the bone and leaves little meat attached. Follow this cut forward until you seem to “run out of meat” around the shoulder and neck. This muscle will be well-defined, and you can locate the side away from the spine easily. Using your knife and fingers, separate it from the other tissues, making a parallel cut to the one along the backbone. Go back to the first cut near the hind quarters and pull on the meat, peeling it away from the deer. As you pull the meat away from the deer, cut it free from the bone along the back side of the meat. Be careful to not leave a lot of meat still attached to the bone. There are ridges and valleys, so don’t let them fool your knife into leaving meat behind. When you are done you will have a long, flat, piece of meat. Now repeat on the other side.
There are two much smaller and shorter muscles along the underside of the backbone that can be removed the same way. These “tenderloins” are soft and are easy to remove. They are well-defined and you simply cut them away from the backbone.
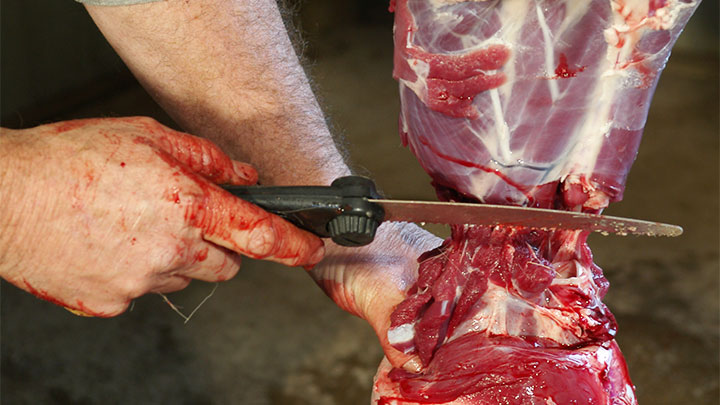
Cut the neck free, using a knife to cut through the meat and a saw to cut the spine. Or if you prefer not to cut the spine, you can remove the meat from the bone with a sharp, thin knife. Don’t forget to remove the windpipe.
If you’re going to use the meat in the ribs, use a knife to cut it all free. Simply follow the shape of the ribs with a thin bladed knife such as a fillet knife or a boning knife.
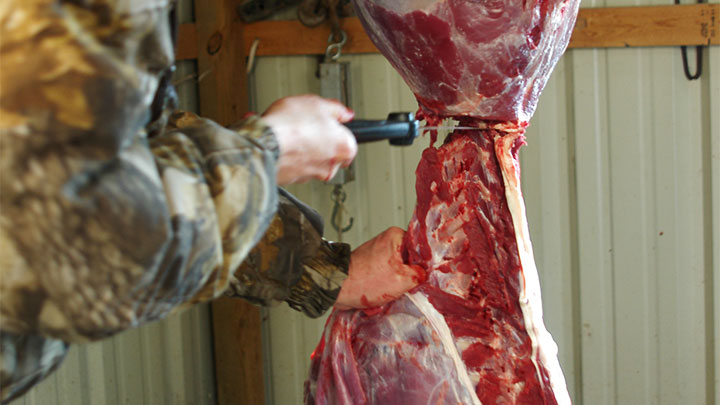
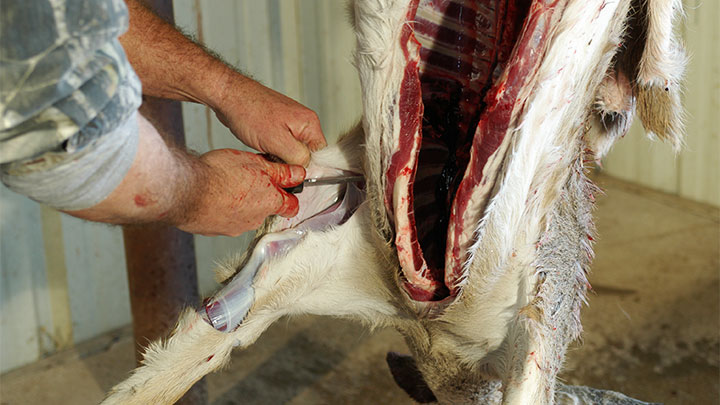
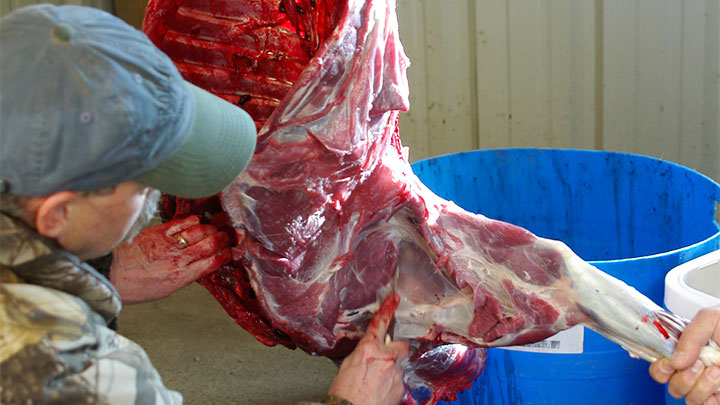
There are a couple of ways to remove the hindquarters. The quickest and easiest way is to cut them free with a saw. Cut through the spine ahead of the hindquarters to remove the backbone and ribcage, then use the saw to split the hindquarters. Next, cut through the leg bone below the gambrel to free the hind quarter. Be careful not to cut the tendon before the bone is severed, as that will cause the leg to fall free from the gambrel. If that happens, the weight will suddenly shift to the other side and the deer will probably slip free from the gambrel and fall to the ground. I think it’s a law that when this happens, one leg must hit you on the head which hurts … a lot.
Obviously, when you cut through the bone to remove the hindquarter the same thing will happen, the other side will pull on the gambrel and possibly cause the remaining hindquarter to fall, but this time you should be ready. Have somebody hold the weight of the other leg as you do this. Then quickly put the hindquarter you just freed on a clean surface and cut through the bone on the one they are holding.
The other method eliminates the need to cut through the spine. Free the leg from the gambrel and pull it away from the carcass. Use a knife cut along the bone in the pelvis to free the muscle. As you pull and cut you will eventually reach the large hip socket. Pull the leg as you work the knife into the socket to cut the ligaments and tendons to free the ball on the end of the leg bone from the hip socket, then cut through the remaining meat to free the hind quarter. If you haven’t already removed the lower leg, put the hind quarter on a table and cut through the leg bone. Some people like to leave the leg attached as they bone out the meat, but I want the hide, hair and tarsal glands away from the meat.
You should now have two hindquarters, two front shoulders, two backstraps and two tenderloins. Also, the neck and rib meat. You may wish to spend a few minutes removing any usable meat still left on the carcass.
As you work, you will create many small pieces of meat that you aren’t sure what to do with. I like to keep a meat tray handy to toss them into to deal with later. I love venison stew and use these pieces for that. Other people prefer to grind them for burger.
Now that you have your deer skinned and quartered you can process the meat in your preferred way. Steaks, chops, roasts, stew, burger; the world is yours.