The terroir of your game greatly adds to the challenge of working with particular flavor profiles. If there is one particular kind of game in which location and time of year affect how you approach the cooking process, ducks and geese take the cake. With that in mind, here are a few things I have learned along the way to make your waterfowl-cooking experience more enjoyable.
Ducks and geese are what I consider the steaks of the skies. Rich and dense, their flavor more closely resembles red meat than any poultry. Their great fatty skin adds flavor and texture.
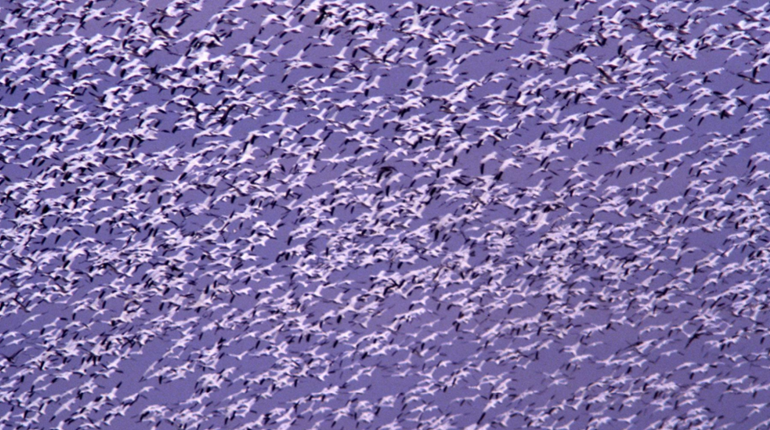
I remember my first cooking experience with snow geese. It was a late-season hunt in Delaware during an unseasonably warm year, and we were hunting fields adjacent to marshlands. We struggled to get the birds to commit, but still were able to tag a few each.
I always prefer to age my birds, but since this hunt and menu was slated to be filmed on site, aging would not be possible. I planned to pluck the birds, pound the breasts slightly then roll and tie them, essentially making a roast of goose wrapped in its skin. Since we anticipated the hunt would produce many birds, I was also going to make a stock from the bones, to aid in creating the sauce. However, I faced a not so pleasant surprise on site: an overwhelming aroma of salt marsh. The birds had been feeding in the marshes for weeks, which was apparent by the smell. As with big game, flavor in waterfowl is carried mostly by fat, so plucking was out of the question.
But instead of abandoning my plan we adapted, using a strip of bacon in place of the skin (remember: use bacon in moderation) and created a sauce of port wine, stock and dried cranberries, a classic combination. I can remember the look of the crew: a combination of concern and reluctance about eating what I cooked. Well, I made 24 goose breasts for six guys, and I believe only three remained at the end of the meal—and they were consumed the next morning.
The moral of this story is adaptation to a flavor profile. It could be snow geese or even sea ducks, but there is always a way to work with the protein. Do not let a recipe hem you in a box. Any recipe (including mine) is there to be adjusted and tailored to suit individual taste and the protein you have on hand.
Working with Fowl
Geographic and seasonal differences have great effects on waterfowl; as forage changes so will flavor profiles.
For the moment, let’s focus on ducks. To keep this simple, let’s break down the varieties of ducks into divers and puddle ducks. Of the two, I think puddle ducks (mallards, woodies and gadwalls, to name a few) are the best-tasting and the easiest to work with because they don’t have the same unctuous, overbearing liver-like flavor profile so many folks claim to dislike. Instead, they are possibly more appealing to a wider audience, or the uninitiated.
Diver ducks, from what I have found, can be tricky since they primarily feed on crustaceans and fish; the old saying “you are what you eat” comes into play. I prefer not to pluck divers, as unwanted flavors generally are carried in the skin and fat. That richness most folks dislike about diver ducks usually doesn’t bother me, so long as divers are cooked properly. The one great aspect of a diver duck is it can stand up to very strong flavor profiles without masking the true flavor. Play with glazes. Sweet and savory or Asian-style flavors can complement but not overwhelm a diver. This is a duck that can take it.
While this broad-brush approach to ducks usually holds true, it is not always the case. During preparation of my “Seared Duck Breast” recipe included here, we cooked mallards and bluebills (puddle ducks and diver ducks), and the taste profiles were nearly identical. So the concept of one type of duck being better tasting is inconclusive at best.
There is not much difference in my approach to flavor profiles with snow geese and Canadas. As with ducks, you just never know. As I have learned through my snow goose experience, sometimes you need to make decisions on the fly. While there is definitely something special about a skin-on roasted goose breast, I was recently reminded why so many hunters opt not to pluck the big birds. I was on a goose hunt in Maryland, and I decided I was going to pluck the birds since they had such a great fat layer. But while the meat was fantastic to cook with, it was a nightmarish job, as I plucked a couple younger birds with tons of pin feathers. My best advice is to remain flexible.
Aging Birds
Hunters have aged fowl for centuries, and the reason why should come as no surprise: It is all about flavor. Like hanging big game, the key to the process is having proper environmental conditions (cold weather) that allow the birds to age but not rot. On unseasonably warm days, I find laying the birds on a tray in the refrigerator works great. However, in most parts of the country waterfowl seasons fall when it is cold enough to hang birds in the open air. My method is simple: Hang them by their necks for up to five days. If I have a badly shot bird, I may let it hang for only two or three days. Regardless, several days is ample time for the meat to relax and let the enzymes break down the muscle fibers, creating a more-tender finished product.
I always keep my birds whole for aging. It has been done for centuries, and it just plain works. In theory, by gutting and then aging, you expose the meat to air and thus bacteria. But by keeping the birds in the round you stomp out any minute chance of introducing salmonella. I know many hunters who hang their birds both ways and none have had problems, though. It comes down to personal choice; some folks can’t get past the idea of aging un-gutted birds and that’s fine by me.
Cooking Techniques
This is probably going to be a surprise to most, but I am not a fan of whole-roasting any waterfowl. A fowl roast looks great but I feel it produces wonderfully cooked breasts and legs that are tough and stringy. Instead, I like to break down the birds and cook the legs separately—but don’t throw away the carcasses.
Bones—I have always been a believer in full utilization of product, as we owe it to the game to try to use as much of it as possible. Duck and goose bones really are relegated to only one task: making stock. Making stock is one of the first basic cooking techniques I was taught as it is the foundation for soups, stews and sauces. I always try to make the largest batch possible, as it is time-consuming (and it requires a lot of bones; see “Fowl Stock”). You will be surprised how often bones get used when they’re on hand. Here’s a great trick: Freeze stock in ice cube trays so when you need only a small amount for a sauce, you always have it.
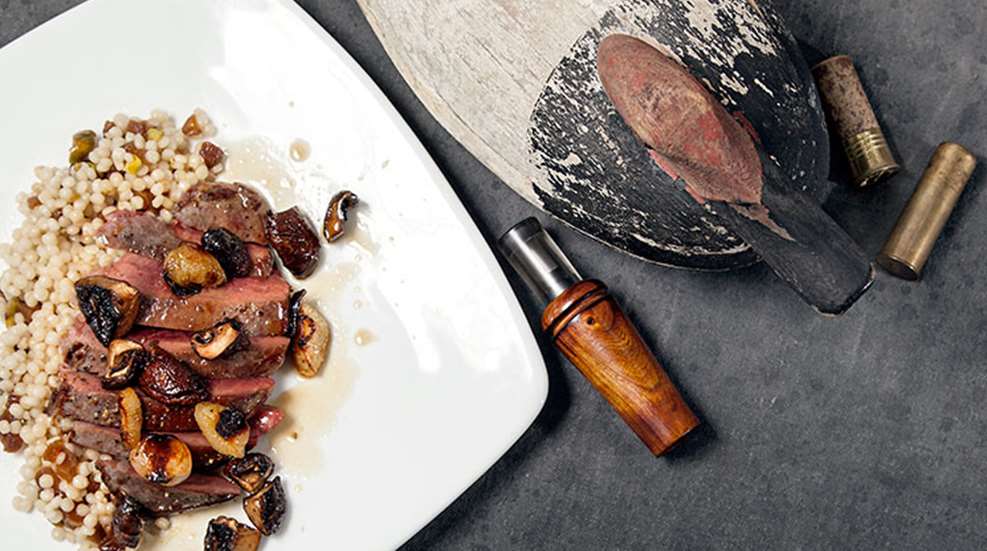
Breasts—I will focus narrowly on the technique of sautéing then finishing in the oven, but there are other methods using dry heat. Cooking with or without the skin requires slightly different methods, although internal cooking temperature always remains the same. All waterfowl should always be cooked to medium rare (an internal temperature of roughly 115 degrees) then allowed to rest.
When cooking a breast without the skin, I like to sear it on high heat then finish in the oven to achieve desired internal temperature.
If you leave the skin on, you need to adjust technique slightly. If you follow the procedure for skinless breast above, you merely crisp the surface, leaving the thick fatty layer behind and producing a complaint (greasiness) I have heard numerous times about waterfowl.
The key is to render out most (but not all) of the fat to produce a crispy, cracker-like skin. To achieve this, I like to lightly score the skin and, over medium heat, allow the skin to render without overcooking then finish the breast in the oven. This way, the fatty richness of the skin still benefits the breast—and in my opinion it’s a better finished product.
Legs—While you can make sausages and soups from them—and I do—one of my favorite methods of cooking legs is the classic confit method. Now, before you stop reading this because of a fancy French term, understand this is one of the oldest methods of preserving food. It translates to “meat cooked and preserved in fat.” It is a method used to store, in this case, duck legs for extended shelf life without refrigeration, and it’s the same concept used in salting and curing. If you have braised a piece of meat, you have basically used the same technique.
Duck or goose legs are cured with a salt, sugar and herb mixture, pressed overnight then placed in a pot of duck fat and cooked slowly till the meat falls off the bone. The technique, developed out of necessity, now fills a culinary flavor profile—creating delicious, tender duck and goose legs.
I like using this technique with larger duck or goose legs (skin-on is preferable). I usually make batches with 10 or so legs at a time. That may sound like a lot, but you’d be surprised how quickly they disappear. This makes a great entrée as a whole leg or, as seen in the included recipe, a great hors d’oeuvre.
Fowl Stock
Conceptually, making stock is fairly simple: a combination of water, bones and vegetables along with some aromatics. However, there is making it and making it properly. There is no replacement for homemade stock; compared to store-bought stocks, your soups, stews and sauces will always boast richer flavor with it. There are times in a pinch when I will use “quality” store-bought stock in a venison or bear recipe, but finding “quality” fowl stock is a whole lot more difficult; it’s out there, though. While chicken stock may be passable for a soup or stew, it won’t cut it as a sauce. For me, making the best quality fowl stock begins and ends with the bones. Roasting the bones to a golden brown will extract the most flavor and in turn produce richer and more flavorful finished dishes. Extracting the most from bones can only occur with the proper ratio of liquid to bone, and time. Follow these simple steps, don’t rush the process and you will be rewarded every time you use it.
• 8 lbs. bones, duck and goose
• 1 lb. mirepoix (onion, carrot, celery, 2-1-1 ratio)
• 1 sachet of aromatic herbs
• 1 gallon water
Directions: In a large roasting pan, place bones in a 450- to 500-degree oven and roast until golden brown, turning as necessary to achieve uniform color. Place bones in a large pot, add water and simmer. Skim the surface as needed. After simmering four hours, add sachet and mirepoix, and continue to simmer for up to six hours. Strain through a fine mesh strainer and cheese cloth; the less the bones are disturbed the better. Allow to cool prior to freezing or refrigerating. Note: If you boil your stock it will become cloudy, which is not a desirable characteristic.