In 2008, I decided to make a major commitment to finding and patterning the biggest whitetails on our farm. Prior to that, I just went deer hunting, sitting on good sign or over narrow funnels waiting for a rutting buck to come past me. I had fun hunting that way, but it was an inconsistent approach and often frustrating because I rarely saw the kind of deer I knew had to be there somewhere.
I finally decided to set out and find an intentional system—not just luck—which permitted me to find deer first then hunt the very best area (defined as the area where a good mature buck was active) each day. That is a tall order, and I didn’t really know where to start. I just dove in and started dog-paddling. Here is the system that grew out of that desire to be more intentional with my deer hunting.
Summer Scouting Fails
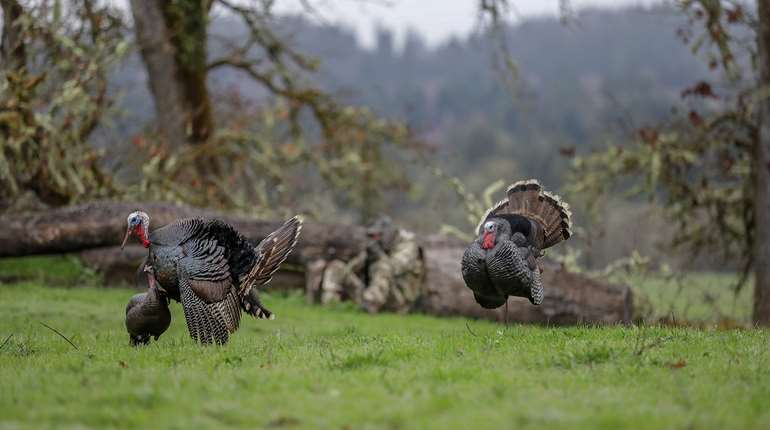
I began spending tons of time in the field during the summer, filming bucks on alfalfa, clover and soybean fields. I started learning more about the local bucks and where they lived. A number of them caught my eye that summer, and the biggest ones became the hope for my upcoming season. I had never done this much scouting in the summer before, and I was shocked by how many big deer I saw, especially during the first 10 days of August. I had a starting point and a fire under my feet, but my excitement that first year was misplaced and short-lived.
Many of those bucks fell off the radar around the end of August or first part of September, right about when they shed their velvet and broke up their bachelor groups. Occasionally, I would still film a nice buck, but none of the big ones I sought. It was my first lesson in the reality of changing home ranges. Many bucks have separate home ranges in the summer and fall. Sometimes they don’t overlap.
Before you can hope to hunt one of the summer bucks, you first have to find him in September, after he sheds his velvet and settles into his fall range. The hunt doesn’t really start until you find the bucks again in mid- to late September, and that is no simple chore.
Bucks become increasingly nocturnal as summer advances into fall. This happens even without any hunting pressure—it is just the way they are wired. So, bucks are very hard to locate through glassing and traditional scouting at this time. The use of trail cameras is the only way you can hope to keep up as they change from their summer ranges to their fall ranges. How you run the cameras to get maximum coverage of your hunting area is an art.
The Art of Camera Scouting
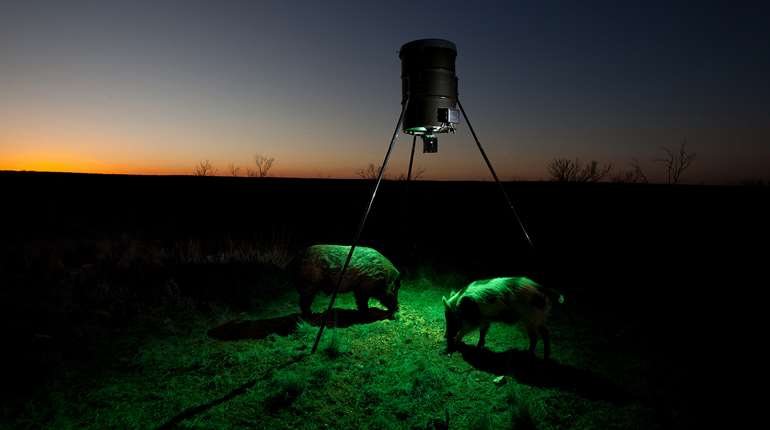
In some areas, you can run a camera over bait, which permits a quicker, more efficient inventory. This practice is currently legal in my home state of Iowa. I run my cameras in their first locations for about 10 days and then move them until I find the bucks again that I want to hunt.
For example, right now as I write this in mid-August, I have two really nice old bucks I want to hunt this fall. I already know where I will place my cameras in about three weeks to start trying to find the deer again. After several years, I have worked out a system of locations that seems to produce photos of nearly every buck around, but keeps me on the fringes enough that I don’t educate them in the process. That is the art.
By placing the cameras in or right on the edge of food plots or farm fields, I feel like I am getting a true sense for where the deer are living. I am not pulling the deer from their normal range just for a bite of corn.
I also occasionally establish the camera site near a heavily used creek crossing or well-used funnel, but I stay well away from sanctuaries and bedding areas like wooded ridges or small, isolated fields.
To keep scent to an absolute minimum, I always wear waders when I go in to check my cameras. With waders on, you can bottle up all your scent and keep it off the grass, brush and ground.
As I said, after a few years you start to develop a sense of where to place your cameras to get photos of most of the bucks in a given area. In my experience, you can get good coverage when using bait if you have a camera for every 30 to 40 acres. In simple terms, I keep them at least 200 yards apart. Surprisingly, I may get a ton of photos of a buck on one camera, but none on the one just 200 yards away. This is particularly true of older bucks that have small home ranges. You need to cover your hunting area well to be sure you don’t miss any of these stay-at-home bucks.
If you can’t place bait in front of your cameras (it is illegal in many states), there are still some good strategies that will help you find these fall ranges. Many of the newer cameras have a “field-scan” or time-lapse mode that permits you to take photos over intervals for a specified period each day. I set mine to take a photo every minute for the last 90 minutes and the first 60 minutes of the day. Using this mode, I can collect very good information about what is happening on a food plot or in the corner of a field without using bait. This method doesn’t give you the information you need as quickly as using bait, but it does offer a solution where baiting to the camera is illegal.
In areas where you don’t have food plots, you can set up cameras on heavily used trails and funnels. I often set them on fence posts bordering open gates or on trees near creeks or ditch crossings. In this case, you don’t have to use the time-lapse of field-scan modes as the deer will be close enough to trigger cameras as they pass.
Just be forewarned: You aren’t likely to find all your summer targets have returned again once the bucks disperse into their fall ranges. Some may move great distances. That is part of the game—the part I don’t like.
Secretly Discover Which Bucks Can Be Killed
Once you find the bucks again, you need to learn as much as possible about their patterns without tipping your hand. Fortunately, this knowledge is cumulative. What you learn one year generally translates to the next year, too. Some bucks will relocate without explanation, but in my experience most have reasonably similar patterns each fall. If they get away one year, what you learned trying to kill them generally can be carried forward to predict their future patterns. Sometimes it takes a few years to figure out a buck. So don’t get bummed if you don’t get him; you are one big step closer to getting him next year.
Once I again find one of the bucks I am after, I generally move at least one other camera (sometimes more) into that area to determine the size and rough boundary of his core area. It is amazing how small the core area can be for some old bucks. One of the deer I shot in 2012 actually had a range of roughly 30 acres (from what I could tell). Once I locate a shooter, I remove the bait and rely on time-lapse mode in openings, and on photos triggered by movement with cameras placed near heavy trails.
Decipher Data
You can learn a ton from each photo if you really dig in. I look for four things.
First, I look for the buck I am after, of course. Second, I look for frequency. How often is he there? If he is there only once per week, I realize I am probably on the fringe of his core area. If he is only there once in a great while (every few weeks), I am likely on the fringe of his range (which is larger than his core). In that case, I don’t feel like I am actually hunting him yet. I need to keep moving and searching.
Third, I look for which direction he is coming from when approaching the camera and which direction he is going when he leaves. I trust the evening photos most in this regard. Morning movement is often much more random. In the evenings, his butt is likely pointing roughly toward his bedding area in the first photo of the buck. That is the most reliable method I have found to estimate where a buck is bedding. You can work backwards from there if he is arriving only after dark.
Finally, I am very interested in the time of day—not just as it relates to movement patterns but also as it relates to daylight. I am reluctant to spend much time hunting a buck that is only moving at night, especially if I think I am close to his core area. I want to see daylight photos before I start hunting him. If you hunt him when he is moving only at night, you may still get him (there is always hope as long as you are in a tree) but you also run a high risk that you will use up your best chance. Remember, the first time in is often your best chance for taking a mature buck, so I like to save that trump card for when the buck is most apt to be killed.
The Final Step
Figuring out where to place your stand is usually the easy part. After you gain all this information about the buck, the stand site will suggest itself. Just be careful with your impact. You may not get him the first time. That being the case, you need a bulletproof exit route so you don’t bump or alert any deer.
I would rather hunt a stand overlooking minimal sign in an accessible spot on the fringe of a buck’s core area than hunt a stand overlooking great sign in the center of it. Time is always a critical ally in this game, and it is on your side as long as the buck doesn’t know he is being hunted. Conversely, if you try to hunt the center of his core area, you might get him the first time in, but you might also spend the rest of the season wondering where he went after you unknowingly bump him that first time.
I had to make this tough choice during the 2012 season when I ended up killing the biggest buck of my life. He was 7 years old that year, and his range was very small, no more than 30 acres at the most. In fact, he was very active in the center of that range based on photos I got from a camera on a ditch crossing that we use to access a small field when planting it.
The buck was showing up on the camera nearly every day in full daylight crossing that tube. Man, it was tempting to go in after him, but I was afraid the swirling winds in that small bottom would give away me and my cameraman.
I was featuring the hunts on daily video blogs on my website and getting tons of advice from viewers about what I should do differently: Most voted for going in after him. I stuck to my guns and eventually shot him from the edge of a feeding area on the fringe of his core. His overall range was small; he didn’t seem to be going anywhere. Time was on my side. It made the most sense to be conservative. If he had been a roamer or his range had overlapped other properties I couldn’t hunt, I might have been more aggressive. Again, this is part of the art of deer hunting—using all your resources to figure out when it makes sense to apply the pressure and when it makes sense to stick to the fringes.
You can make this strategy work—I know you can. Eventually, the pattern will take shape. It may take more than one season to solve some of the harder puzzles, but if you are diligent you will eventually solve them. It really is a lot of fun and a super rewarding way to hunt whitetails.
Most Popular