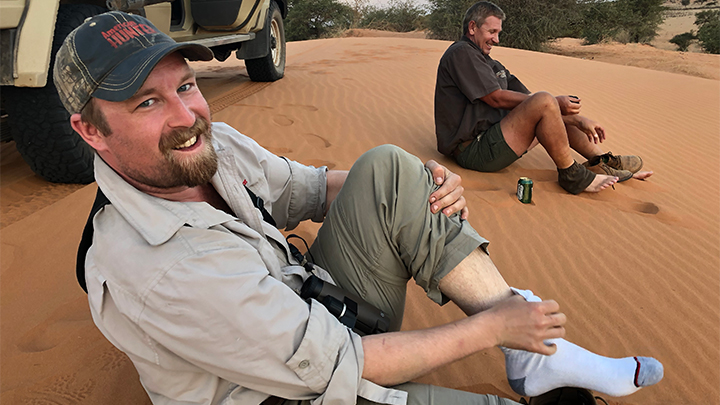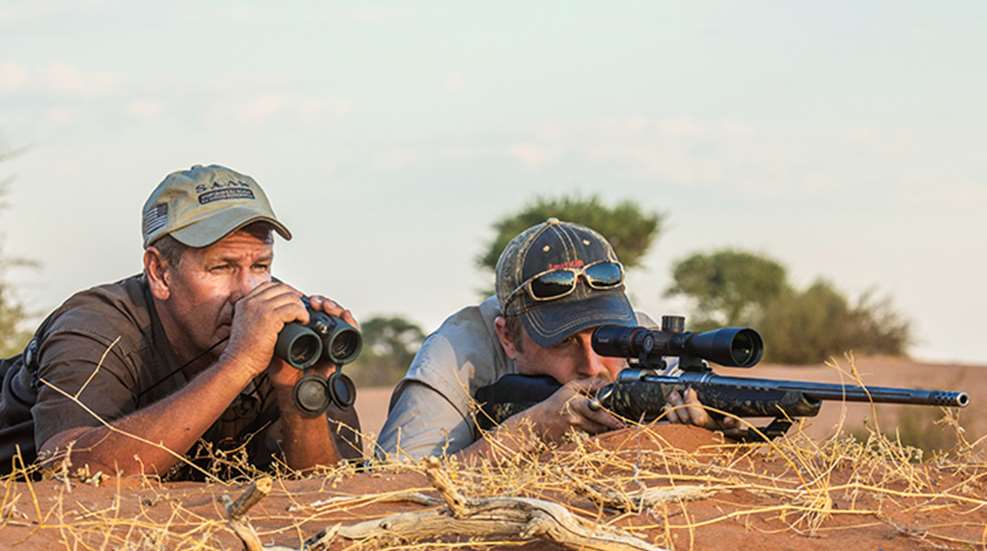
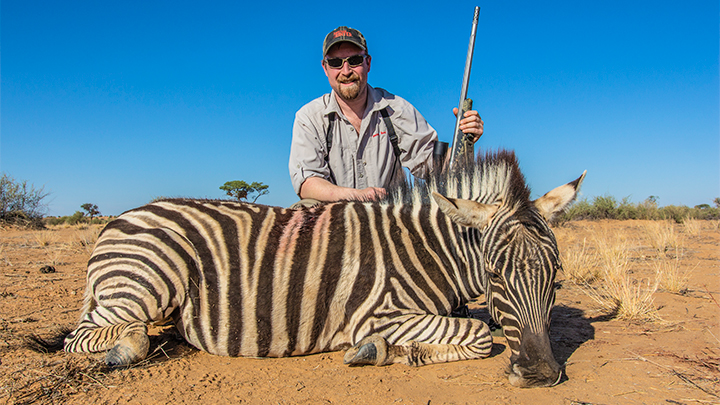
We had worked the wind in an enormous circle to close the distance, and the zebra, 80 yards out and grazing on the dry grasses, remained unaware of our presence. Kneeling, I set my rifle—a Savage 110 Bear Hunter chambered in .338 Win. Mag.—onto the sticks and met up close my first head of African game. It was a chip-shot scenario, the kind a client and professional hunter (PH) wish for. Even still, the sight of those crisp black and white lines cemented Africa’s version of buck-fever tight on my nerves. And though I pleaded for a bit of luck to pull me from the sickness, with that shot and each successful shot that followed, confidence with my rifle and ammunition proved the best medicine.
The key to building that confidence prior to going afield with any firearm is simple: shoot, shoot and shoot some more. But it’s practical range time that counts, not benchrest shooting. And you need to start with a rifle and ammo combination that is the best it can be.
Choosing a Firearm
Plainly stated, a good rifle is determined by results, not price tag. The only real advice I have for anyone looking to grow a take-anything bond with a big-game hunting rig is to start with a rifle capable of taking the game you wish to take. Don’t expect a .243 to be an elk slayer, and save your long-range bench gun for the gun club. Choose a bolt gun, lever action or semi-auto that is chambered in a practical caliber, with a design that doesn’t become a hindrance in the field. Put the right bullets into it, top it with even halfway-decent glass, and nearly any rifle can become a shooter.
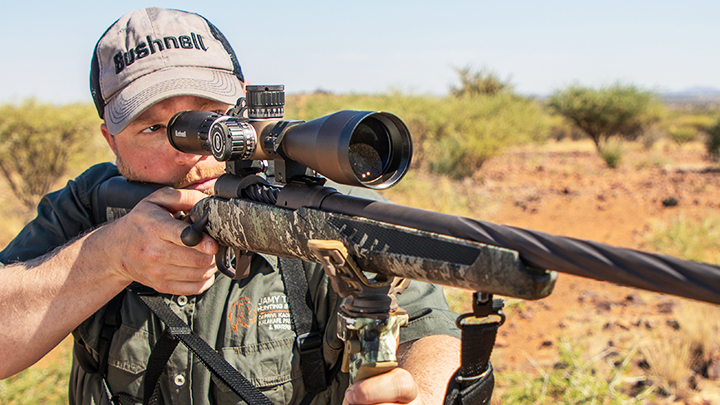
In the case of my Namibia hunt, I chose the newly released Savage 110 High Country in 6.5 Creedmoor. It’s a relatively lightweight bolt gun, perfect for smaller game like springbok, blesbok and gazelle. The Savage 110 Bear Hunter in .338 Win. Mag. would act as the muscle for larger game like zebra, kudu and gemsbok. It’s certainly more gun, but its heft balances beautifully. And thanks to the Savage AccuStock, customizing both rifles to fit me and the Bushnell optics I put on top of them was a breeze.
Ammo Selection
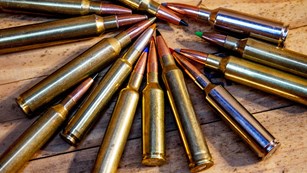
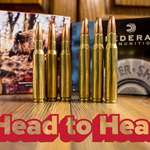
There are currently more ammunition choices available on store shelves than there are rifles to shoot them. My advice? Keep it simple. You’re looking for penetration, expansion and accuracy. Find a good match for all three and you’ve got a winner. Lucky for you, we live in the Golden Age of factory ammunition, and companies like Federal are now producing off-the-shelf loads capable of extreme accuracy with incredible terminal performance (see “How to Choose a Hunting Bullet").
We all know some rifles prefer certain loads over others for seemingly no more reason than to make a hunter crazy, so use the variety of available ammo to your advantage. Your uncle may have suggested a common factory load that dropped plenty of deer 20 years ago, and the latest long-range wonder-bullet advertisement may tout its ability to turn you into Carlos Hathcock, but there are multiple options out there that will do the job. Do yourself a favor and ditch the preconceived notions. Test a variety, at least two to three suitable options, and choose the one your rifle shoots best.
In preparation for my Namibia hunt, I chose three different loads to test with each rifle. For the 6.5, Federal’s 130-grain Barnes TSX, the 120-grain Trophy Copper and the 140-grain Nosler AccuBond all seemed like great options. As for the .338 Win. Mag., I wanted to make sure I could drop a big eland should I come across one, and the 200-grain Federal Trophy Bonded Tip, 225-grain Trophy Copper and 225-grain Nosler AccuBond loads certainly all have the terminal ballistics necessary for the job.
With ammo in hand, your next stop is the shooting bench to find out which load delivers the tightest groups. With proper technique, breathing, trigger control, allowing for cool-down time between shots, barrel swabbing, etc., you should be able to weed out fairly quickly the loads that either won’t group, won’t feed or for whatever reason seem to have the performance consistency of a weed-whacker outboard. Set those loads aside as options for another rifle and move on.
Of course, you could get lucky, as was the case with my 110 Bear Hunter, and find you have an indiscriminate rifle that shoots everything well. Either way, after a few range sessions, some trial and error and perhaps a scope issue or two, you should end up with an obvious winner. It’s time to buy a few more boxes of your top earner and begin to build that bond.
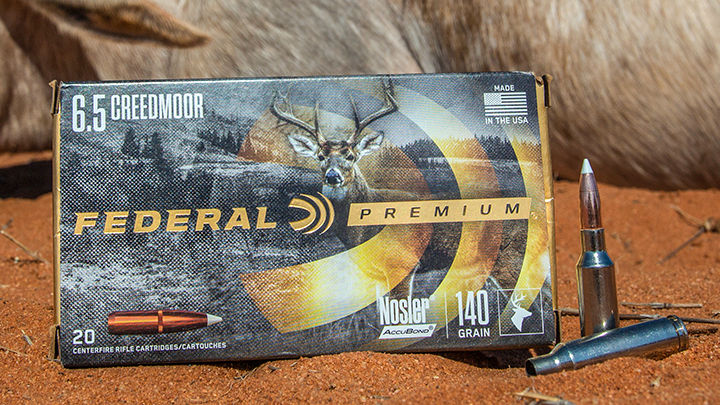
The 110 High Country loved the 140-grain Nosler AccuBond, which pleased me greatly, as I've had amazing results in the past with that bullet. The combination of weight, fast expansion and a bonded core has always delivered devastating impacts, in my experience, and that's just the performance I was looking for to drop smaller game in its tracks. But performance doesn't do much good if a bullet won't group through your rifle. Lucky for me, the AccuBond shot nearly one-hole groups time and again through that Savage rifle.
Cementing a load for the .338 proved a bit more challenging, as all three loads I tested shot amazing groups. Certainly, credit must be given to the ammo, but in addition to a great recoil pad, the ability to customize my rifle to fit—in regard to both length of pull and comb height—allowed me to tame recoil and hold tight groups. Because each load would work for any big game I'd encounter, my final decision came down to which load I had more of to play with. The solid-copper shank of the 200-grain Trophy Bonded Tip is a deep penetrator I knew would hold up through tough hide and big bones.
Build Your DOPE
In my opinion, a good DOPE chart is the foundation for building a strong bond with your hunting rifle. On many hunts, success comes down to the speed at which you can take an accurate shot on game, and a DOPE chart (data on previous engagements) provides a hunter with a fast and accurate trajectory reference to consult when needed. Get comfortable with yours, and you’ll be amazed how much it reduces the time it takes to make an accurate shot.
The distance at which you zero your rifle is up to you but for my money, nothing beats the speed of good old fashioned maximum point-blank range.
With my two rifles set for MPBR, I am able to hold dead on out to 300-plus yards for a clean kill, and with a DOPE card taped to each stock, I’ve got the holdovers out to 500 yards available at a glance should I need them.
Regardless of how you choose to zero your rifle, speed is the name of the game when it comes to DOPE. Remove the need to calculate a shooting solution from the equation and you speed up the process of taking a confident shot.
Practical Range Time
Let’s make one thing clear: This is not the time for benchrest shooting on paper. You should no longer be impressed by cloverleaf groups at 100 yards. You’ve chosen your ammo, you’ve "doped" your rifle and have confidence the rig is the best it can be. Now is the time to build a bond and expand your confidence with practical range time on reactive targets that will provide instant results.
Small groups are out, and so are maxed-out riflescopes. Think groups 6 inches or smaller, and a zoom range that provides a wide field of view—somewhere from 3x-6x—so you can track a moving animal and locate targets quickly. Your goal with practical range time is to simulate as many different real-world hunting scenarios as possible given your range allowances. If you don’t have access to a range where you can get off the bench, shoot off sticks or go prone, find one.
I practiced the following shots prior to going to Namibia; each of them simulate a real possible shot on any big game you may encounter in the U.S.
Shooting Off Sticks
This is the most likely shot scenario a hunter will encounter in Africa, and it’s also the shot I’ve taken stateside most often on elk and mule deer. You see an animal, set the sticks, mount the gun and shoot. It sounds simple enough, but as most hunters have experienced, the terrain never cooperates, animals are always moving and time is of the essence.
Are you a better shot kneeling or standing? How do you hold the sticks with your forward hand while still holding the rifle? Where do you place your rifle in the yoke for optimum balance? How high do you set the sticks for a proper sight picture? Here’s where you figure out all of this, not on the mountaintop with a buck broadside at 200 yards. And don’t give yourself benchrest time allowances here, either. Think in terms of seconds. How long is that animal going to stick around? If you’ve set your DOPE for MPBR, as long as you’ve got a half-decent range on the bull and he’s within or close to your limits, you simply need to set the sticks, mount your rifle, center the crosshairs and pull the trigger.
The first step is to test different positions. Sit on your butt, sit on your leg, kneel on one knee, stand, crouch—try them all. You’ll find that you prefer at least one position over the others. You’ll also find that your accuracy isn’t what it was from the bench. That’s okay—as long as you can ring an 8-inch steel plate, you’re in business.
Once you find the position you like best and you’re confident you can get off a shot within your range allowances in under 10 seconds, it’s time to enlist a friend for some help.
Here's the drill: Find a safe, open range where you have the ability to walk toward a 100-yard target and fire at various distances. With a friend acting as your “guide,” either walking beside you ready to call the shot and work the sticks or standing behind the firing line simply calling the shot, begin to slowly “stalk” toward the 100-yard target. At random intervals, your buddy will call the shot, either from your side or from behind the firing line, signaling a shooter animal is in range. At this point, set the sticks and attempt to take a well-placed shot in under 10 seconds. Your goal is to simulate quick shots at various distances. If you’ve set your rifle for MPBR, all you need to do is steady the crosshairs and fire.

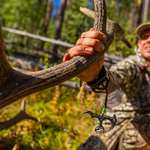
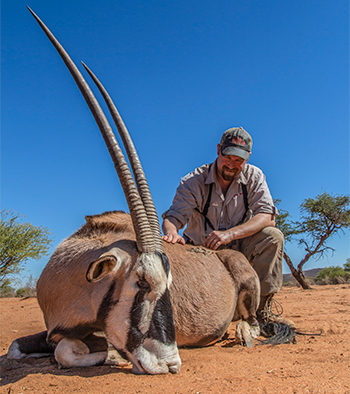
My PH set the sticks several times on the heels of a tall-horned gemsbok in preparation for shots ranging from 60 to 200 yards before the bull finally made a mistake. We’d stalked him for nearly a mile in the African heat, adrenaline pumping with each flash of color seen through the thick bush, and having already relayed to the guide my preference in a standing shot vs. kneeling (something I should have done prior to taking a shot on my zebra) it was a quick process when the gemsbok stepped into the small window at 165 yards, his chest just visible above the tall grass. We only had a moment to pull it off, and the .338 barked almost the instant it hit the sticks.
Going Prone
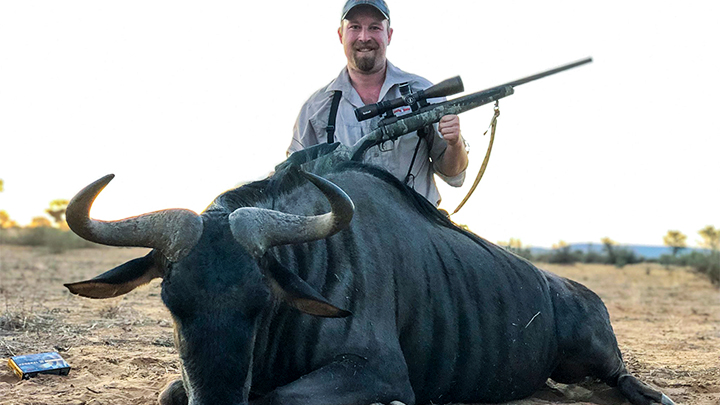
I’d still not fully processed the zebra that fell an hour earlier, and was now heading toward a distant sand dune, on the other side of which we knew would be a herd of blue wildebeest. We’d seen them from about a mile off, their dust cloud capturing the pink colors of the setting sun, and picked a reference point on the other side of the dunes they were paralleling. Swinging wide, we gained the right wind and closed the gap between us. Discussing our options at the base of the dune, it was determined we’d simply crest the hill, throw down a pack and pick out a bull from the group that we estimated would be about 150 yards from our current position.
It turned out our estimation was more than a bit off. As I positioned my pack for what I assumed would be a fairly leisurely glassing session before a calm and collected shot was taken, we saw the herd wasn’t 150 yards out like we expected, but 30 yards away and locked onto our position. Two big bulls stood out as the herd turned and whirled away. I tracked the bull on the left to around 100 yards before he stopped and offered a shot, but the guide called out, “Shoot the one on the right!" Eyes scanning, I swung my rifle to the right and was on a new target before the dust settled. The crosshairs in my scope settled above his backline then on the hump of his shoulder before I simply dropped them to center mass and squeezed the trigger. The 140-grain AccuBond from the 6.5 zipped through him so fast he didn’t know what to do except turn and fall. I was confident in the shot, despite the distance and change of target, because I had practiced the following drill relentlessly.
As with sticks, you’ll need to first determine your preferred prone position—how you place your legs, arms, elbows, etc.—to maximize comfort and stability. Trust me, you and your neck have a preference, and you’re much better off finding out what it is now as opposed to when a dandy pronghorn shows himself above the prairie grass and your eye can’t seem to find clear glass.
For the following drill, you’ll need a friend and a range out to 300 yards, but anything past 100 will do in a pinch. The goal here is to simulate a common prone shot off a pack. First, set up a variety of reactive targets—five or six should do—at varied but known distances, and designate each target with a number one through six.
As you lie prone, have your partner call out numbered targets in random order. Your goal is to be able to locate the target and take the shot in less than 10 seconds. Start with a single target, then advance to strings of two or more. Set the targets with good separation at varying elevations that require more than a simple shift of your rifle to acquire, if possible.
The more you practice this drill, the better prepared you’ll be for a quick prone shot on any animal within your range. Moving or not, once he stops, he’s yours.
The Follow-Up Shot
Ah, the follow-up shot. It’s the one shot that can save a hunter’s bacon, yet taking it often means we’ve already screwed the pooch, sucking once-high confidence to an extreme and doubt-inducing low just before another critical shot must be taken. It’s a doozy, but practicing for it allows you to maintain confidence when you need it most, and it all starts with keeping your head down on the gun.
Here’s the drill: Start at the range with two reactive targets set at any interval that allows for a good change in distance—100 yards and 150 yards is perfect. The goal of this drill is to fire two shots off sticks, hitting each target in succession. The focus of this drill should be to keep your head down and on the gun after the first shot, quickly locate the second target with both eyes open as you work the bolt and chamber the second round, place your reticle and take your follow-up shot. Your buddy can be there to call you out if you lift your head. Just remember, keep your head down and use both eyes to locate that second target. You’ll find that simply keeping your head down on the gun will drastically speed up the process of a follow-up shot. Adding this drill to your regimen will help you maintain the confidence to take it.
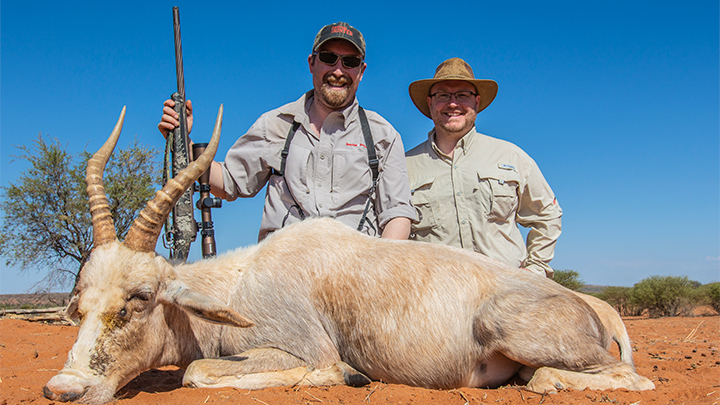
I needed that confidence when a trophy white blesbok was spotted as we poked around the desert one afternoon. The blesbok was inside 100 yards, just how we like them, but as I placed my cheek on the stock and brought the weight of my torso down onto the sticks, the legs of the shooting sticks sunk more than a few inches into the sand and my clear sight picture disappeared. With the buck poised to bolt any second, I lifted the sticks and rifle with my control hand to the appropriate height, settled a fraction of my weight on the rifle as to not push them deeper again, steadied the crosshairs as much as I could and fired. The buck took off at a full-speed gait that indicated a clean miss. Head still down on the gun, I was able to track him as he crested a small dune, spurting dark blood from a low, center-mass hit. I followed him in the scope, worked the action deliberately and when he stopped again and a range of 307 was called, I was ready.
When it comes to building confidence with your rifle and ammo, it’s pretty simple: shoot, shoot and shoot some more. Sure, an African plains-game hunt provides opportunity to see the positive results of your training on a daily basis and can be a great confidence booster, but like any big-game hunt, it’s also a quick ticket on the confidence-sucking train of despair if a hunter doesn’t prepare himself for the moment. A truly strong and confident bond with your hunting rig is built, like any meaningful relationship, by spending time with your rifle and ammo. Start with a capable rifle, stoke it with ammo it likes, make range time a fun and practical experience and become the hunter you’ve always wanted to be.