What’s the number one impediment to most hunters building their own bolt gun? This was the topic of an informal survey I conducted among my friends and fellow hunters when I first started thinking of doing a build myself. Answers varied. The most common was regulation. As you still have to fill out a 4473 to lay hands on a receiver, you might as well just buy a fully built rifle. I can sympathize with that perspective, but despite the added hassle, there is still a deeply ingrained allure in assembling your own meat-provision tool. The remaining answers were all some variation of lack of knowledge, centering on one large misconception: ‘It’s not an AR—I can’t just buy a barrel, slot it in and torque down the nut. I’d have to send the gun off to a gunsmith to finish anyway, so what’s the point?’ As it happens, that is simply not the case. Thanks to modern machine processes, with the right tools and a bit of know-how, anyone can build a quality backcountry rifle in their own shop, and for a far sight less than a comparable rifle from a custom gun-builder. With this theme fully in mind and a point to prove, I got some tools together and got to work. Follow along below for exactly how to build a backcountry-capable rifle all your own, with your only trip to a gun store being the one necessary to get your receiver.

The Parts
The first thing you need to decide on is your action. The natural choice for a home builder is the Savage 110 as it uses a barrel nut, but I considered that unfair play for this article, as that very quality eliminates the need for a lot of the know-how being discussed. So, while I have a long affinity for the old stalwart, I decided to look beyond it. Then along came an opportunity that was impossible to pass up.
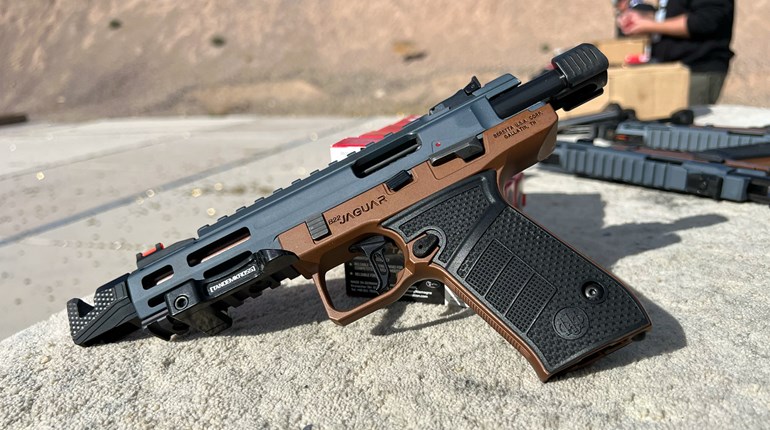
It's not every day you get to base your build around an action previously unavailable as a standalone purchase. It’s an even rarer opportunity that it’s an action you’ve formed something of a rapport with. I’ve chased deer, hogs, coyotes and cats from Idaho to Texas with the Springfield Model 2020 action. It’s lights-out accurate, smooth cycling and utterly dependable in a pinch. When I heard the company was branching out into selling standalone actions, I knew I’d found my ticket.

There are a variety of reasons the Model 2020 action is such a strong contender in its newfound field. With a Remington Model 700 footprint, the action accepts a wide range of aftermarket stocks and triggers, which are among the most personalized elements of any build. Despite this, Springfield’s engineers deigned to not make the action a true 700 clone, instead opting to make a few proprietary improvements.
The first indication is the dissimilarity of the bolt release, located on the receiver itself rather than underneath at the trigger guard. The bolt is necessarily different as well, though not simply because of the release. Springfield sought to eliminate some of the weaknesses of the old 700-style extractor system, leading to an entirely new bolt design. I can attest to the efficacy of their improvements, as I’ve never had an extraction issue on any Model 2020 action, though the same cannot be said of the old 700. This of course led to a different bolt-to-barrel interface, which ultimately necessitated a different tenon design entirely. The recoil lug is also built into the action, which eliminates the need to align it. So, while the Model 2020 action is mostly classic 700 on the surface, the internals of the action are as freshly designed as its namesake year, and the performance proves it.
For every innovation there is a cost however, and in this case, the cost comes in barrel selection. As mentioned, the Model 2020 is new to the custom-build scene, and without being able to make use of a standard 700 barrel, finding one is a slightly tougher proposition. The good news is, some quality makers have stepped into the breach, and builders won’t be disappointed with their choices. BSF (who makes the barrels for Model 2020 rifles), Proof and Straight Jacket Armory were the first three barrel makers to emerge, and while the former two companies make incredibly nice carbon-fiber options, Straight Jacket Armory (SJA) offers a wide variety of pre-fit stainless-steel barrels. Being a longtime aficionado of this classic material, I quickly settled on SJA and got to work.
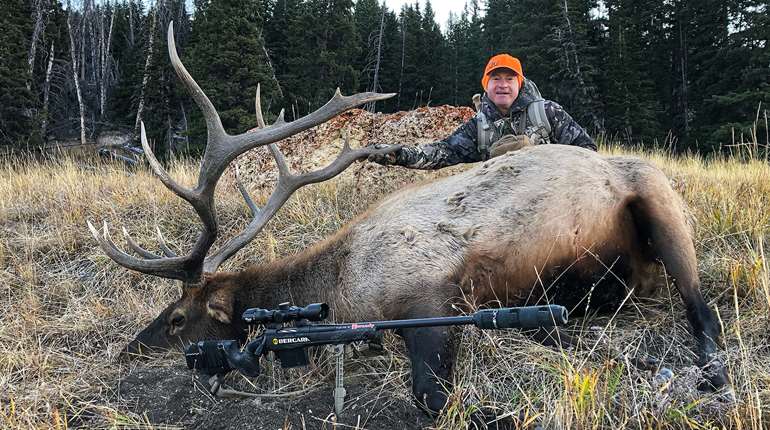
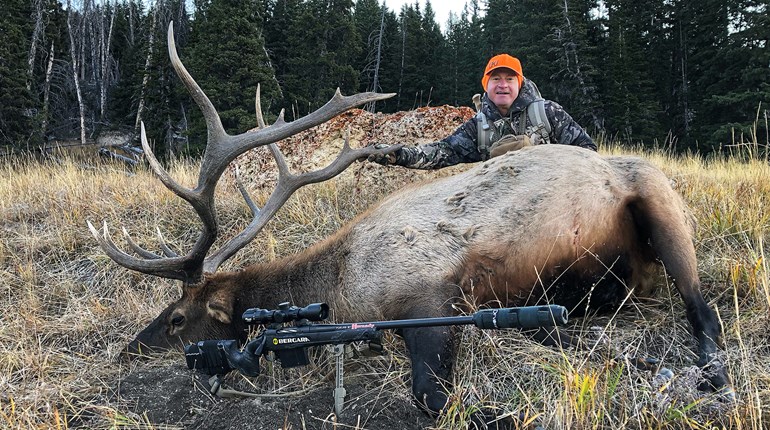
It's worth taking a few steps back here to consider the initial choices in building a bolt gun. For starters, what are you hunting? My build has one very specific use-case in mind—backcountry muley and elk. As a result, I knew I wanted a chambering with more than a little terminal energy, and settled on 7mm PRC. I’ve always been skeptical of new wonder cartridges, having hunted most of my life with .30-06 Springfield and .308 Winchester. When 7mm PRC hit the scene, though, I had to admit something seemed different. I had been mulling over the perfect hunting 7mm for a while, and this one seemed to hit all my metrics, with an average of 3000 fps of muzzle velocity behind beefy, 170-grain high-BC projectiles packing a serious punch. This of course meant I needed a long action Model 2020.
Next, what barrel length and profile would best suit this 21st century 7mm? The first consideration should be your muzzle velocity. I have done my share of hunting with 16- and 18-inch barreled carbines. Particularly in the dense eastern deerwoods, guns like this are light, maneuverable, a cinch to suppress, and push bullets fast enough in most calibers to easily take anything 300 yards and under. The shorter barrel sacrifices no small share of velocity, however, with the general rule of thumb being 25 fps for every inch shaved, and this gun is destined for the distances of the American West. As a result, I went for a 22-inch long barrel, willingly sacrificing some maneuverability for better performance downrange.
Next is profile. I will be the first to admit, for a build like this, a thin, sporter-style profile will likely be the best choice for most hunters. With excellent cold-bore and follow-up shot accuracy, a sporter has been the go-to choice for sportsmen for decades. The problem for me is, I simply shoot too much. Both for my profession and to satisfy my curiosity in general, I’m always testing various loads, am too cheap to buy a barrel cooler, and am easily frustrated when my groups begin to open after just a few shots, necessitating a prolonged pause. I also have the urge to run this gun in the occasional NRL Hunter match to stay sharp for the season. As a result, my barrel needed more meat, a few extra ounces be damned. I settled on the Medium Palma contour as the perfect all-around profile. Far too light for a competition gun, but a little heavier than is common for general backcountry use, the Medium Palma contour would provide me with a fair amount of use before opening up groups, without breaking my back in the hills.
Those of you reading closely will have noticed that SJA doesn’t just make barrels for the Model 2020 action, they make pre-fits. So, what exactly is a pre-fit barrel? Put simply, it is the marvel of modern machining which makes this entire operation possible, gunsmith-free. Thanks to the negligible tolerances allowed by modern machining practices, a pre-fit barrel can be turned and threaded without referencing the exact action it is going onto, safe in the knowledge that anything within the stated specs will be well within tolerances and mate right up. Find the barrel you want, let the company know your action, and all you need is a barrel vise, action wrench and some elbow grease to turn your serialized receiver into a full barreled action, no outside gunsmithing required.
Unlike the standard bench vise probably sitting in your garage right now, a barrel vise uses two large hunks of metal with a hole in them to fit snugly around a barrel. They come both as standalone pieces, or as accessories that can be squeezed with an existing bench vise, and generally utilize a range of included inserts to adjust the inside diameter (ID) of the hole to the outside diameter (OD) of your exact barrel. I turned to Brownells to find a good one, settling on the Short Action Customs Bravo as the perfect choice. With five different shims to handle virtually any diameter of barrel I might tackle in the future, the vise installs easily into any bench with just two bolts, and provides a grip like a pit bull when tightened down.

The beauty of Brownells is it’s a true one-stop shop for firearm tools and accessories, which can save a home builder money and time by lumping quite a few of the necessary parts into a single shipment. If you’re looking to do a build yourself, I’d advise putting together a list of parts ahead of time and seeing how many you can get directly from Brownells to knock a few dollars off the process.

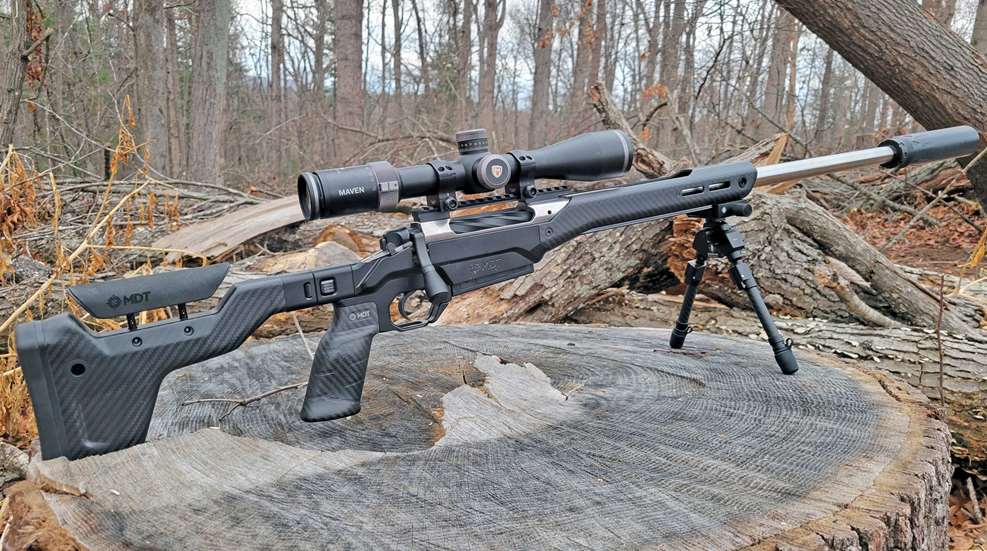
As it happened, this strategy worked out great for me, as Brownells carried several of the other components I was interested in. First off was the MDT HNT26 chassis. I’ve been intrigued by the HNT26 since its introduction several years ago, seeming the perfect blend between rigid functionality and almost unbelievable lightness. I opted for a folding stock variant with an Arca Rail fore-end for my intended accessories. Brownells also carries 7mm PRC Go/No Go gauges from Manson Precision, which are a sine qua non for fitting your own barrel; more on that later. With most every component selected, I turned to the final piece—the trigger.
The ultimate interface between shooter and rifle at the time of the shot, the trigger is both the most essential and most subjective piece of any rifle. I wanted something with a clean break, but that was also adjustable, so I could set it to the perfect poundage that balances lightness with peace of mind. Timney offers a wide variety of models that fit this bill perfectly, perhaps none more so than the 510-V2 Elite Hunter. Adjustable from 2 to 4 pounds with a simple Allen screw, along with a tunable overtravel, it’s a hard trigger to beat for both functionality and customization. Settling on this and a set of Red Hawk Rifle trigger pins, it was time to get to work.

The Process (Part 1)
As so often happens in this line of work, my build hit an immediate snag. As mentioned, Model 2020 actions are brand new on the custom scene, so while SJA offers pre-fits for the Model 2020 action, mine was one of the first to roll off their line, and they wanted to make extra sure it mated up properly. This necessitated my sending in the receiver for barrel fitment which, to my horror, seemed to upend my entire idea for the build. Then I realized this was a blessing in disguise. One of the many qualms I heard from friends and acquaintances about building their own rifle is a lack of accuracy. Could they really make a barreled action shoot as accurately as one fitted together in a factory? As a result, I determined to put the whole rifle together, shoot it for groups, remove the barrel, refit it, and shoot those groups again, to prove a home-torqued pre-fit can send lead just as well. As a result, I’ll delve into the barrel fitting process further on down the line.

Barreled action in hand, I flipped it over, slotted in the Timney and drove in the trigger pins. A very simple procedure, as long as you make sure the short pin is in front (so as not to interfere with the bolt stop), and you’re driving the pins in rounded side first, there’s really no way you can go wrong. Trigger secured, I laid out the MDT chassis.

Yet another component that is almost elegant in its simplicity, to install the action, you simply place it into the chassis, ensure the recoil lug drops snugly into the recoil lug well, and loosely tighten the action screws (long one in back). On this particular action, it was necessary to use one of the included shims on the short front screw, to keep it from contacting the bottom of the bolt face and locking the action. Action in place, you slide on the fore-end, push it firmly rearward, and torque down the pre-Loctited screws to 25 in.-lbs. Once this is in place, go back to the action screws and torque them both to 65 ft.-lbs. While I did double-check both screws with an automotive torque wrench I use on engines, I initially accomplished all this torquing with just the toque wrench from my Fix-It-Sticks Long Range kit, a common tool in the shooting DIYers arsenal. While generally more relied upon for work on optics, it was able to torque my action screws with pinpoint accuracy.

Next, I checked length of pull (LOP), and while the gun does come with a number of shims capable of adjusting LOP from 12.5 to 13.5 inches, found it already well suited to my stature at 12.75 inches. I then moved the comb of the rifle up until I no longer had to crane my neck down to get behind a scope. Finally, while you don’t really need to with a factory torqued barrel, I did run the Mason Precision Go/No Go gauges into the chamber just to be safe, and found everything to be well within spec.
To accomplish this, slot the "Go" gauge into your rifle's chamber. If the bolt closes and locks over it, great! It has passed the test. If it does not, this means the chamber area is too tight. If the gun passes the "Go" test, move on to the "No Go." If the "No Go" will not chamber, you know your rifle is within spec. If it will chamber, however, the chamber is too loose. If the gun fails either test, it is best to have a chat with a gunsmith, or the barrel maker. These simple tasks done, the rifle was, quite literally, ready to shoot.

Accessories
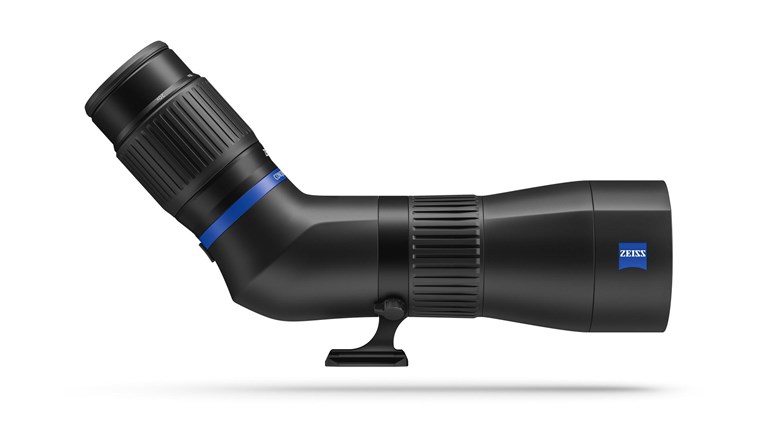
Ready to shoot and ready to shoot well are surprisingly far apart. Before hitting the range, I still needed an optic, a muzzle device and a way to attach the gun to a tripod. I started by affixing a Maven 1.2 to the Picatinny rail atop the action.

The Maven 1.2 is designed from the ground up for western hunting. With 2.5-15x magnification, ballistic turrets, a first focal plane (FFP) reticle with graduated holds, and adjustable parallax, it is ready for precision at all hunting distances and well beyond. The optic’s 44 mm tube is easy to find rings for, and doesn’t weigh a gun down much at all, tipping the scales at just 26.4 ounces.

Next came a Dead Air Nomad 30. The stalwart of Dead Air’s hunting line, this 30-caliber suppressor boasts solid stainless steel construction, a 14 ounce weight and stretches a middling 6.5 inches. The coolest part? It utilizes Dead Air’s R Series Front Caps, which means you can add an E-Brake to it to tame recoil if desired. While I’m not taking advantage of the particular tech yet, it’s a pretty tempting proposition I make try out down the line if the gun ever sees competition use.

Lastly, I affixed a Spartan Precision Arca-Rail-to-MagnaSwitch adapter. This would allow me to solidly attach the gun to either my Ascent Tripod, or Javelin TL bipod as the scenario required. Thanks to the MDT’s Arca Swiss fore-end, this piece is easily and quickly adjustable from both a more centered position for tripod use, to a forward mount when using a bipod, all with the simple twist of a knob.

Testing (Part 1)
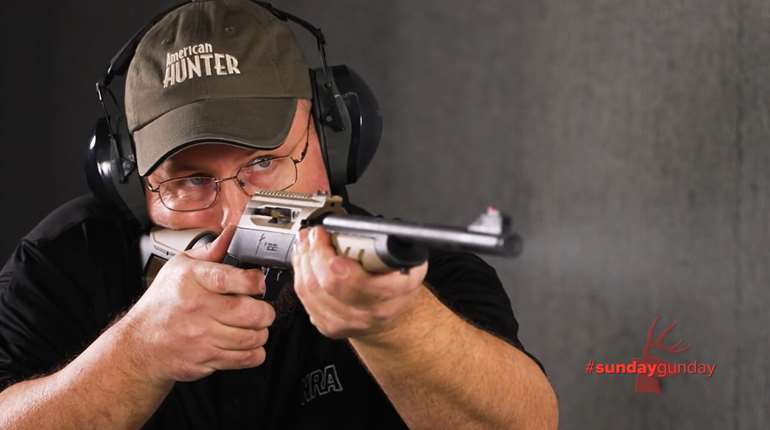
Now comes the fun part. As I settled down behind the gun for the first time (post break-in shots, of which I did 20, with a cleaning after each), I felt some degree of trepidation. Would it group well? A poor performance would send me right back to the drawing board. Three shots in however, staring at a mouse-eared hole in my target, I felt immediately relieved. I had a shooter. The ballistic results below speak for themselves.

The Process (Part 2)
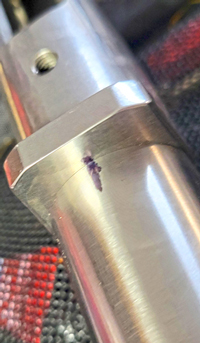
Job done, I headed back to my bench and bolted down my bench vise. I removed my action from the chassis, detached the pic rail, and tightened the barrel down into the vise above the shoulder at the closest, thickest point possible, wrapped completely in drywall tape kindly provided by Short Action Customs with every Bravo to prevent marring. Next I wrapped the action in drywall tape and attached my Wheeler #2 700-pattern/round-action wrench. The alignment screw hole did not quite line up with that of the Model 2020, but it’s merely a nicety. The important part is to have the slot on the wrench aligned as flush as possible with the recoil lug. That tightened down, I got ready for removal. SJA’s barrel torque setting is 80 ft./lbs. Before unscrewing, I marked the barrel and action so I could be sure it was back in the exact same position (though my Go/No-Go gauges would, of course, be my final check).

It took a little elbow grease, but sure enough, the barrel came unscrewed. I checked both sets of threads, ensured no damage had occurred, cleaned it, then did the process in reverse, tightening it and ensuring my marks were exact. Then I reassembled the rest of the components and eagerly awaited my next range day.

Let me take a moment here to give one piece of advice to folks doing their build without having the barrel screwed in when it arrives at their door—get an internal action wrench that you can use a torque wrench on (a Wheeler #2 has no torque wrench attachment). Torque settings on bolt-action barrels among DIY builders have long been thought of as having a German (gutundtight) torque spec: as long as your Go/No-Go Gauges return the proper results, and your barrel is torqued down tight enough that it won’t unscrew, you’re good to go. I myself somewhat ascribe to this—if your Go/No-Gos check out and the barrel has been tightened solid with a wrench, there is no reason it wouldn’t shoot properly. That said, I also have a lot of time behind wrenches, and in this case had the luxury of a mark showing exactly where it was tightened down to previously. If you have an internal action wrench, you can easily attach a torque wrench to it and make sure your barrel is at the exact spec recommended by the barrel manufacturer. Do it. No harm ever comes from an extra layer of security. As it happens, I took half my own advice. Rather than updating my wrench collection, I eventually borrowed a buddy’s to check myself, finding that I had eyeballed it to about 75 ft./lbs.

Testing (Part 2)
Finally, the day came. Fouling shot aside, the gun was immediately back to its old ways, shooting about as well as it had from the factory. In fact, with two loads it shot a little better—check out the results below. The only further modification I might make in the future is pulling the barrel back off to have it fluted, which will shave about half a pound off my overall weight. Knowing how to pull and reinstall the barrel makes this a quick and easy process, rather than a procedure necessitating an FFL.

So next time you have a hankering for a fun pre-season project or want a reason to use your shop in the dead of winter, give a bolt-gun build a try. It’s fun and satisfying to watch a great group manifest out of something you assembled with your own hands. Make sure to check out a Model 2020 action if you do—it’s pretty hard to make one shoot poorly.