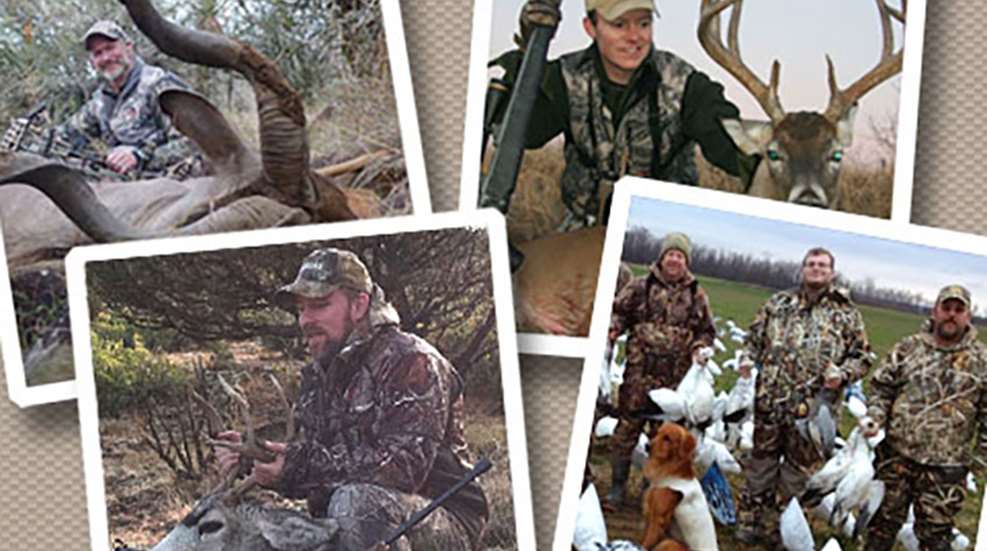
Arguably the only thing better than scouting a big buck and successfully tagging it is the memory of having done so. That’s what stays with us long after we’ve savored the last backstrap, gets us through the off-season doldrums and inspires the best conversation wherever hunting camps are shared.
What’s the best tool for hanging onto these memories? Taxidermy is high on the list, as it preserves hoof and hide. Journals are also an enjoyable means of doing so. However, I believe there’s nothing quite like a photograph to keep a good hunting memory fresh. Instantly you have a record of the animal, the gun you used, the place, the time and even the emotion you felt. Certainly a good photo is the most efficient means to share that memory with fellow sportsmen.
Yet so many hunters lack even rudimentary photography skills. You don’t necessarily need to know everything about aperture, ISO and shutter speed, but there are a few very basic rules every hunter-photographer ought to follow. Here’s how you can use photography to better preserve your hunting memories and add to your overall enjoyment of the outdoors.
Get the Deer Out of the Truck
My friend Bill had just shot the deer of a lifetime—an honest 170-inch buck, shot in Pennsylvania of all places. The photo hit my inbox and I dropped what I was doing to admire Bill’s trophy: There it was, with Bill, field-dressed and splayed along the tailgate of a truck.
Why is it that so many people put in years of time and effort, finally shoot a dream buck, then treat the photos as an afterthought? A deer in the bed of a pickup is a particular pet peeve of mine. I wouldn’t go so far as to call it tasteless, but it is lazy, and it doesn’t do any favors to the quality of an animal.
So, step No. 1: Get the deer out of your truck. Even photographing it in your yard is preferable, though far from ideal.
It’s best to photograph the deer before it ever reaches the truck and prior to field dressing. This of course requires having a camera on hand at all times. Even a cheap disposable camera or your cell phone will suffice if necessary, but today’s DSLR’s (digital cameras that accept lenses) and small “point-and-clicks,” such as the Nikon Coolpix, are increasingly affordable. By taking photos of the deer at the location you shot it, you’re likely to produce better quality images and a nicer representation of where the buck was taken.
And you can do so even if you hunt alone. Many cameras now have a self-timer function that will allow you to photograph yourself. Just rest the camera on a log or, better yet, a small tripod, set the timer and snap away. I’ve even set my camera on an overturned bucket.
Properly Angled Hero Shots
The most common hunting photo is, of course, the so-called hero shot, in which the successful hunter poses with his or her downed game. There are two common errors here: Framing the photo too widely, and photographing the individual from a standing position.In my opinion, the best, hero shots are nice and tight—in other words, there’s little space or background material surrounding the hunter and the buck. Yes, today you can easily crop the photo later, but you’ll achieve better detail by tightly framing the shot.
Also, be sure to photograph the hunter from his or her eye level or preferably a few feet lower. This mistake is most prevalent in big-game photos. The hunter crouches with the deer and the photographer snaps away from a standing position. The resulting images are awkward and the angle tends to “shrink” the buck’s antlers. Instead, ask the photographer to kneel for the photo session. You’ll do justice to the animal’s size, and it’s also easier to “skyline” antlers—some folks believe racks are more easily seen when displayed against a blue sky rather than with brush or other background interference. But make no mistake, whether your quarry is deer, waterfowl or any other game, the best hero shots are usually taken from eye level or lower.
Finally, the sun should be at the photographer’s back to best eliminate shadows and properly expose the photo. Ideal light is found in the soft glow of dawn or dusk, but if you shoot a buck at high noon you aren’t likely to wait around. You can learn to tweak your camera settings to account for the harsher mid-day light, but first things first: Always use a flash in bright sunlight.
Big Game Considerations
Big-game hero shots tend to frame up more nicely in horizontal photos, which display the entire animal. Tuck the animal’s front and hind legs underneath it, sit on your behind near the front quarters, and hold it gently by the back of the neck. I find this technique to be more tasteful than, for instance, holding the buck by an ear. Avoid holding the buck by the antlers, as this tends to make them look small. And never sit on the animal, as many consider this disrespectful.
What About the Blood?
Certainly you should wipe off any excess blood from your deer or ducks, as you want the photos to show respect for the animal. However, I think some hunters go overboard. I even know a couple of hunters who Photoshop the blood out of their photos. Guess what: Sometimes when you shoot things, they bleed, so don’t worry if your photos aren’t completely blood-free.
Perhaps more importantly, make sure the deer’s tongue isn’t sticking out. It just looks ugly, and can easily be remedied by removing the tongue or placing a small, inconspicuous rubber band around the lower jaw.
Keep the Camera Rolling
Now that we no longer have to buy film to keep our cameras running, there’s no reason not to shoot a ton of photos. And you’ll see many benefits to doing so.Certainly your odds of getting a good shot or two increase if you shoot 100 photos rather than three, but there are other incentives as well.
For instance, every season some of my favorite photos are simply snapped during the hunt, when my buddies didn’t realize they were being photographed. Think outside the hero shot: your buddy loading his gun; a dog gazing skyward at passing ducks; Uncle Steve working the rattling horns. If you snap a few photos now and then throughout the hunt, you’ll record more good memories than you may suspect. Posed shots are great, but a little improv can be even better.
So, keep those cameras rolling. But don’t just shoot the same photo 100 times. Play with the angle, the light, the way you frame the subject—any variables you can think of. In doing so, you’ll have many different photos to choose from, and you’ll learn what works and what doesn’t.
Plus it’s amazing how much you can learn about photography simply by taking more photos. Your brain will better recognize good photo opportunities and more quickly process how to best compose them.
However, one of the biggest keys to taking a greater quantity of good photos is simply having fun with it. Shoot a bunch of photos and before long a few will make you say “wow”—that’s when you’ve caught the bug. And don’t forget to send photos of others in your hunting party to them. It adds to the camaraderie of the group, as all can share in the memories preserved by the photos. What better way to further enjoy the outdoor pursuits?


