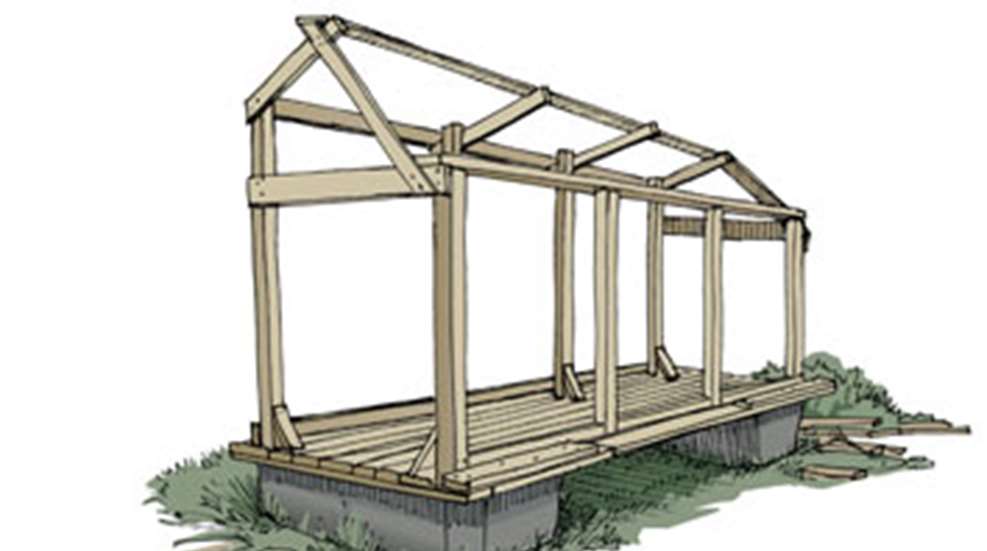
A floating duck blind rises and falls with the water level, so you’ll never have to worry about heading out for a morning of waterfowling only to find your blind underwater … or 100 yards from shore. And if the wind is wrong for your setup, you can simply tow a floating blind across the water and set up in a different location.
The simple floating duck blind described here is intended to be moored on the water’s edge and hunted from while on the bank or in shallow water. As so designed, it is not stable enough to be hunted from while fully floating in the water; if you wish to hunt from such a blind while fully afloat, a “T” portion extending from the rear of the blind must be built and attached; this portion must house additional floats that provide the stability needed to keep the blind from tipping over when hunters are in it.
The foundation of the blind begins with specially manufactured, dock-supporting floats. Handy hunters have saved money by using 55 gallon drums, but because they are round and do not have built-in attachment points to mount a duck blind frame, you must be skilled in welding to make them float the blind evenly. For easy construction, buy dock floats from www.dockbuilderssupply.com. Individually, the 24x48x12-inch polymer float has 434 pounds of buoyancy and costs about $73. This project requires two of them.
1. Lay out two floats with the outside edges measuring 8 feet apart. Cut four 2x6s into 4-foot boards (a). Lay each one across each float width-wise. Using a pencil, mark all the float’s attachment points on the boards and drill ¼-inch holes to accommodate the lag bolts. Replace the boards and bolt them on tightly. Use washers on both ends.
2. Cut the remaining 2x6s into 8-foot boards (b) and screw each one to the four crossbeams from step 1. Use eight wood screws per board for maximum holding power.
3. Cut four 2x4s into 4-foot posts (c). Using metal framing brackets or angled wooden supports (d), screw each post into the floor at the front edge of the blind—one at both front corners and two in between them. Screw one 2x4 (e) across the top of these front posts to serve as a gun rest.
4. Cut four 2x4s into 5-foot posts (f) and repeat the process on the back edge of the blind’s floor using metal brackets at the floor for each. Screw one 8-foot 2x4 (g) across the back of these posts and a 4-foot 2x4 (h) across each side. Individually measure between each rear and front post and cut six 2x4s (i) to match. Screw each of them down on the floor between each post to keep shells and gear from rolling out of the blind.
5. Cut four 2-foot 2x4 (j) roof joists and attach them to the top of each rear wall post using 45-degree metal brackets. Cut one thin 8-foot strip of wood (k) or molding and screw it to the end of all the roof joists.
6. With heavy shears, cut squares of chicken wire and attach it to the frame with staples. Leave one or both sides open for entry and/or a middle section of the back wall if you plan to enter the blind from the rear. Cut out a square hole in the wire for a dog on either the right or left front side. Camouflage with natural cover or burlap, or buy RealGrass from Avery and zip-tie it to the chicken wire. Customize your blind further by spray painting, building gun rests, shelves, eyehooks or a trolling motor mount bracket as needed. If you prefer a wood bench buy a 2x8 board and make a bench along the back wall, using 2x4s for support. Lastly, attach an eyehook to the platform and anchor the blind.
Materials/Tools
❑ Two floats, 24x48x12 inches
❑ Eight galvanized 1/2x41/2-inch carriage bolts w/washers and nuts
❑ Galvanized 3-inch woodscrews
❑ Pressure treated lumber:
❑Four 2x6s, 4 feet
❑Eight 2x6s, 8 feet
❑Six 2x4s, 4 feet
❑Two 2x4s, 8 feet
❑Four 2x4s, 5 feet
❑Six 2x4s, 2.5 feet
❑Four 2x4s, 2 feet
❑One 1x2, 8 feet
❑One 2x8, 8 feet
❑ Eight metal framing supports
❑ Spoll of chicken wire
❑ Avery RealGrass (optional)
❑ Rope, 50 feet
❑ Eyehook, ¼-inch
❑ Wood saw
❑ Drill with ¼-inch drill bit and screwdriver attachment
❑ tape measure
❑ Pencil
❑ Two adjustable wrenches
❑ Metal-cutting shears
❑ Staple gun
❑ Grab spray paint


