To practice the perfect grip, hold your grip arm (the left arm, for right-handed shooters) out with the thumb pointed straight up at the ceiling. Now rotate your wrist to the right until the thumb points at a 45-degree angle toward the ceiling. The knuckles of your hand should be aligned in a 45-degree angle as well. Cock your wrist up slightly—as if you were throttling a motorcycle—so the knuckles point toward the ceiling rather than the target.
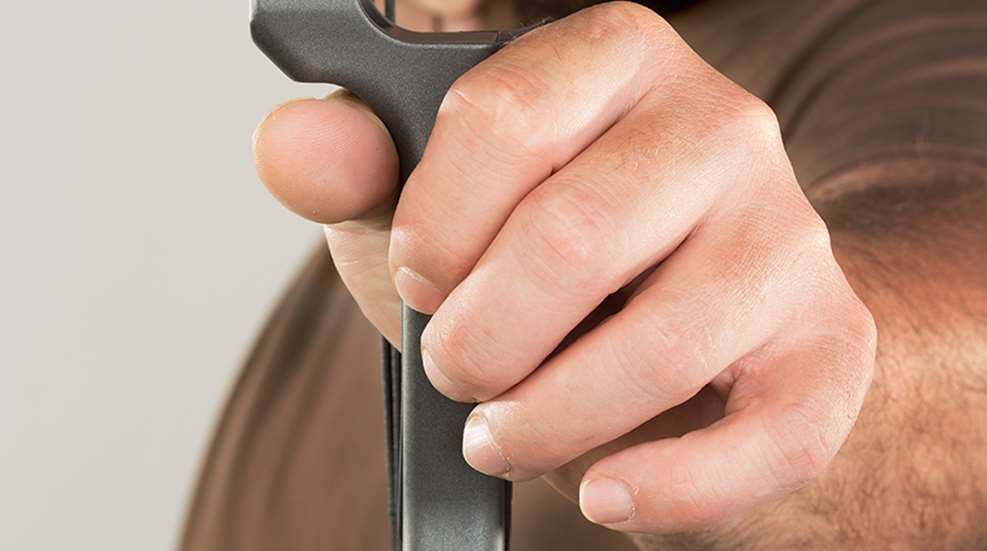
Now imagine a line running from the deepest part of the "V" formed by your thumb and forefinger down to the center of your hand where it meets the wrist, in the seam between the two muscular pads that form the palm of your hand. Run the grip of the bow vertically along this line, with the throat, or the skinniest top portion of the grip, in the aforementioned "V."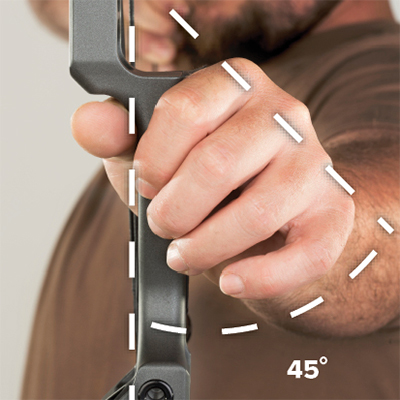
Place the index and middle fingers on the front edge of the riser and exert slight pressure to keep the bow in place while drawing. Your ring and pinky fingers should never touch the grip at all.
As you reach full draw, completely relax your hand. The bow will be held in place only by the rearward pressure of its draw force. Next rotate your hand toward the ceiling at the wrist so the knuckles point up and your palm points toward the target. Grip pressure will now be distributed evenly in the hand. The bow’s grip should barely touch the lower pad of the palm, if at all, but rather in the seam between the two pads. This is called a low grip, and is usually better for compound bows than a high grip used by traditional shooters.
Finally, wiggle your fingers to make sure they are relaxed, then let them hang naturally. The thumb should be relaxed but pointing toward the target parallel to the arrow. If your pointer and middle fingers touch the front of the grip slightly, that’s ok, but ideally they should hang a millimeter from it. The goal is to make as little contact as possible with the bow’s grip, thereby reducing grip-induced torque on the bow as the string is released.
A split second after the release, tighten your grip so the bow doesn’t fall from your hand. If you think you might drop it, consider using a bow sling, but with enough practice you’ll be able to do this without the need for a sling that could cause torque on its own. Practice this grip until it becomes second nature, even as a big buck walks in and turns broadside this fall.
Most Popular