Whether you’re just getting started or have been bowhunting a while, consider this your guide to being a proficient archer; after all, even experienced bowhunters need to review their shooting form annually to eliminate bad habits that could cost them come November.
Stance and Grip
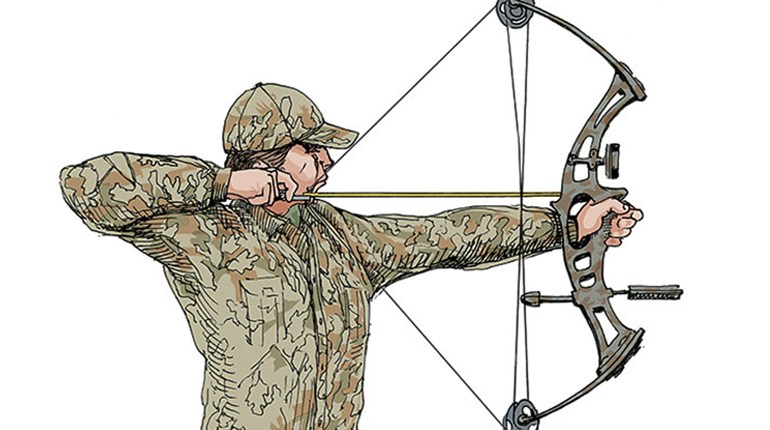
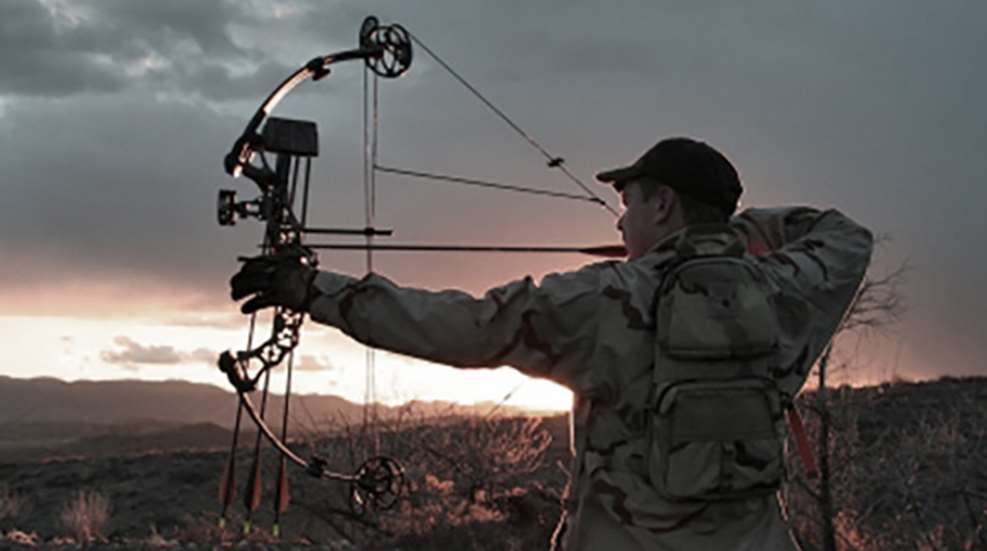
Any athletic move starts with the right stance and fundamentals. Archery is no different. Begin by aligning your feet, hips and shoulders about 15 degrees to your right of the target (if you are right-handed). Place your weight evenly on both feet—about shoulder-width apart. Avoid leaning away from the target at full draw.
Maintain a 90-degree angle between your upper body and your bow arm. This is important, because it allows you to use the correct muscles (your upper back) at full draw to hold back the string. Maintaining this 90-degree angle also assures consistent shooting even in awkward settings, such as sharply uphill or downhill shots.
The grip is among the most important fundamentals and easily overlooked. Your hand position on the bow needs to be precise and extremely consistent shot after shot. It is easy to get sloppy and just grab the bow and draw back, but that can lead to bow torque. Torque, in this case, refers to the residual forces that build up in the wrist and hand that cause the bow to start turning off the target from the instant you release the string. What the bow is doing after the arrow is gone is an indication of what it was starting to do while the arrow was still on the string.
The point where your palm’s lifelines converge (between your pointer finger and thumb) is roughly the correct pressure point between your hand and the back of the grip. More technically, it is that point on your hand that lines up with the bones of your forearm. Pressure at this point won’t cause your wrist to hinge. You don’t want a hinging wrist because it creates another variable you have to control. Let your fingers dangle, don’t make any attempt to either close or forcibly open your hand. A wrist sling will prevent you from dropping your bow.
Your bow arm should be bent just enough to unlock your elbow—this helps to remove tension from your arm.
Anchor Point and Draw Length
You can attain a good anchor point by placing the large knuckles on your release hand against the back of your jawbone, right under your ear. Some bowhunters actually place their extended thumb behind their neck. As a second reference point, touch the tip or side of your nose to the string. If the string stretches well past the tip of your nose, your draw length is too long.
When you have the correct draw length the elbow of your release arm will point straight behind you. Have someone watch you shoot to help determine if you have this correct position. Don’t over-stretch to achieve a long draw length. Turn your head comfortably toward the target and then draw back the bow until you achieve the correct anchor point with your elbow pointing straight away from the target.
Shoot the highest draw weight you can handle accurately. If you can’t draw the bow back five times in rapid succession and then hold the last draw for at least a minute without shaking, you are pulling too much weight.
Concentration
All the other aspects of the bowshot are mechanical in nature (for the most part), but the ability to focus single-mindedly on the target is something you need to practice in a different way. As you aim, narrow your focus to the smallest part of the target you can see clearly. You may remember the old saying, “Aim small, miss small.” That definitely applies to archery. The smaller your aiming point, the more accurately you will shoot.
Concentration takes practice. You have to specifically set out to improve your concentration skills in order to achieve this goal. Again, lock in on the smallest portion of the target you can distinguish and stay locked on until the arrow hits.
Aiming and Squeezing
Now we get to the real meat of this tutorial: executing the shot. The standard way most bowhunters learn to shoot a bow is similar to the way they shoot a shotgun; they slap or pull the trigger when the pin momentarily passes the spot they want to hit. It is intuitive and it feels right, but it eventually leads to target panic (the mental inability to hold the pin on the spot while aiming).
In some cases, target panic gets so bad that the archer literally locks up (usually below the spot) and no matter how hard he tries, he can’t get the pin to move onto the target. He ends up flipping it up with his wrist at the moment he triggers the shot. It is ugly. I know because I have been there.
Forget the shotgun technique; you have to shoot a bow as if it were a rifle. Squeeze the trigger so that the shot takes you by surprise. In so doing, you eliminate the “now!” command that subconsciously rings through your head when the pin pauses for a moment on the spot—forget about timing, focus on the process.
The pin might hover around the spot for a few seconds before the bow goes off. Next time it may be a second or so more. So what? This isn’t a race. There is no reward for shooting fast. We are trying to shoot accurately under supercharged hunting conditions, and that requires a method that is panic-proof. So we must learn to discipline ourselves to fight through the urge to hurry. We must keep aiming and keep squeezing until the bow goes off. Once you break through and reprogram your nervous system, this shooting method is easy and surprisingly accurate.
The pin does not have to stop in order for you to shoot your bow accurately. Even if the pin is floating around the spot the entire time you are squeezing the trigger, you will shoot amazingly well. You have a mysterious centering instinct that tries to pull things toward your point of focus. As long as you keep focusing, keep the pin on the spot (as best you can) and keep squeezing without any attempt to control the timing of the shot, you will be shocked at how well and how consistently you shoot.
I can hear the rumbling from here: “Yes, but deer don’t stand still for five seconds.” In some cases, you are right. You may have to speed up your trigger squeeze when shooting at animals that are prone to move; however, you will shoot much better on game by slowing down, picking your spot and squeezing off the shot. The tendency is to rush shots at game. You have more time than you think.
Follow Through
The final step of the shot is the follow-through. Hold everything until the arrow hits. Maintain your mental focus and your body positions. Because of the surprise release, your release hand will fly back and your bow arm will jump forward slightly. Otherwise, nothing moves. Simply maintain your body positions. Keep aiming until the arrow hits.
A good follow-through will cover up many sins. Remember, what the bow does right after the arrow leaves the string is the same thing it is starting to do while the arrow is still on the string. Eliminate movement right after the shot and you will shoot much better.