If you’re planning on going hunting, you should also plan for success. Your first move after downing a big-game animal is taking care of the meat so it will provide you and your family with many meals of the purest, healthiest protein on the planet. And the first step to ensuring the quality of game meat is field dressing—removing all organs containing waste or bacteria that can spoil edible meat. Although there are many ways to skin a cat, the following method is proven, relatively easy and used by hunters around the world.
The Big Picture
The first thing to remember before field dressing any game animal is the goal of doing so. The goal is to remove the animal’s guts so that they cannot taint the meat. Removal of the animal’s guts and abdominal organs also speeds up the cooling process of the remaining carcass, further decreasing the chances of the meat spoiling due to bacteria infestation that thrives in heat.
However, often first-time field dressers become overly focused on a technique they’ve read about or become confused by the entire process and fail to remember the simple goal of the exercise. Fact is, it really doesn’t matter how the guts are removed from the animal, so long as they are removed. To remove them, one must simply cut the animal open before pulling and cutting the guts free of the connective tissue that binds them to the abdominal walls. Regardless of the method chosen, if you do this, you will have successfully field dressed your animal.
Like many endeavors, however, there are some tips and tricks that can make the entire process more efficient, so follow this 10-step procedure until you develop your own.
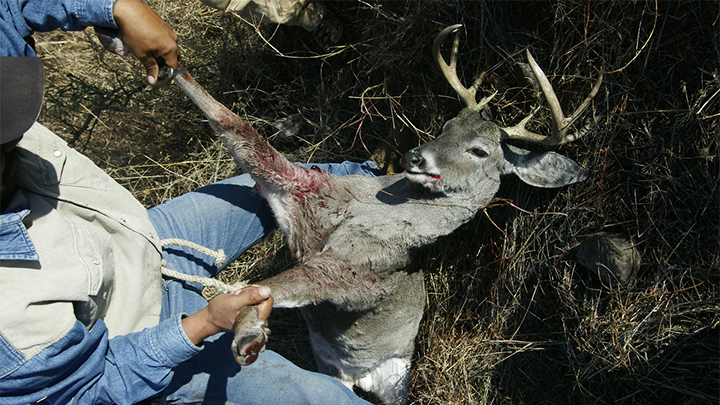
Step 1: Slow down and take time to place the animal in a location where it’s easiest to work. For example, if your animal perished in a brush pile, amid a briar thicket or on a steep slope, take a few minutes to pull the animal to a place that’s more conducive to working over it. While some people like to hang the animal feet down, I’ve found field dressing is easiest with the animal lying on its back, on a slight incline so its hind quarters are downhill. If you have a tarp or clean area, place the animal on it to minimize grass and grime on the carcass.
If help is available, ask your help to hold the animal’s rear legs open, so access to the abdominal area is easier. If you have no help, place one of its legs so that it rests on your outside hip, thereby spreading the animal's legs as wide as possible. Next, try to find good lighting. If you don’t have overhead lighting—like in a garage or skinning shed, or even the headlights of a truck—a headlamp is better than trying to hold a flashlight in your mouth. Seeing what you are doing is critical in this process.
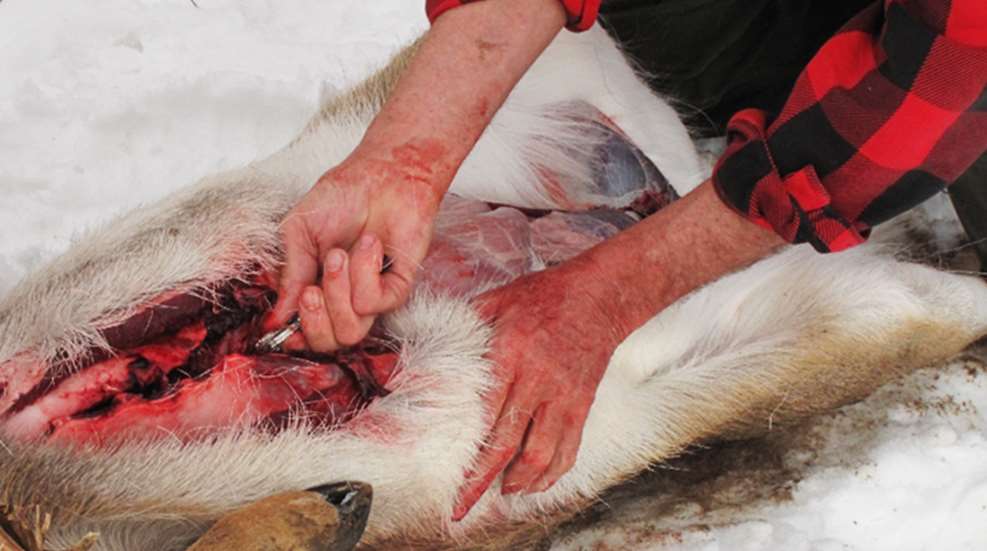
Step 2: Lift the animal’s tail and thoroughly cut around the animal’s anus, so it and the large intestine are no longer attached to the pelvic canal. While any knife will do, a knife with a long and skinny blade, such as a filet knife, is best for this step.
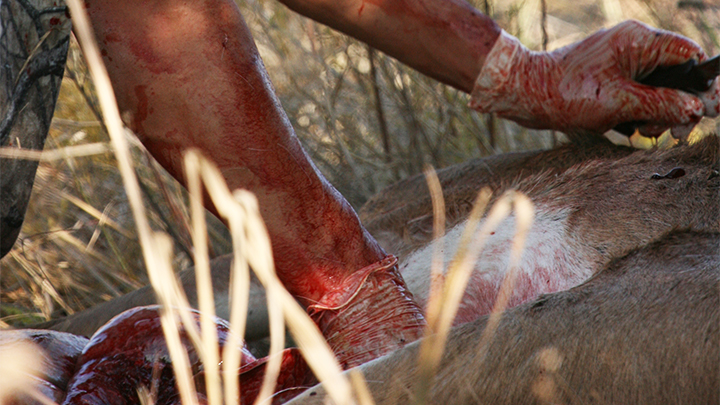
Step 3: Using your knife, carefully cut a small hole through the hide, the fat and the abdominal wall of the animal's belly just under the animal’s sternum. The goal here is to make an incision from the sternum down to the animal’s anus without puncturing the guts. If you do puncture guts, don’t worry! It’s smelly, but it happens. Using two fingers to guide the tip of the blade and to create space between the guts and the belly wall, begin in the hole you’ve created and run the knife down the belly, cutting from the inside up so that the back of the knife blade is on the guts and the knife’s edge cuts only the abdominal wall (belly skin) and the hide.
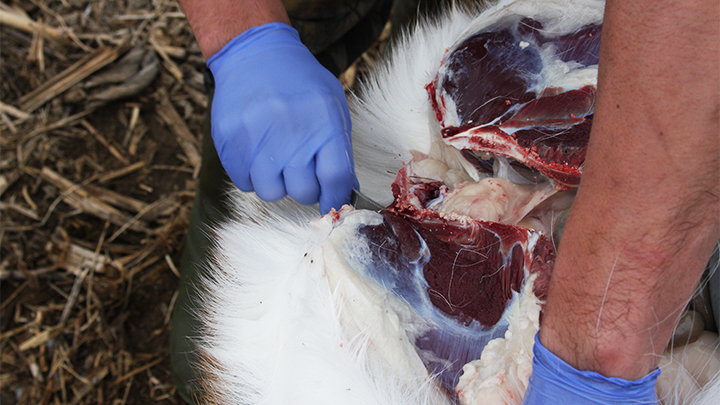
Step 4: When you get to the down to the point where the stomach ends and the muscles of the inner thighs begin, cut through the thigh muscles until you feel the pelvis bone with your knife. On male animals, cut to the left or the right of the scrotum and continue down. Now, take a hatchet and give the central, thinnest portion of the pelvis a sharp whack until it cracks. Then push the animal’s knees outward until the pelvis cracks open, exposing the large intestine and anus that should be disconnected (Step 2) and easily removed.

Step 5: Beginning just below the diaphragm (or the partition of tissue that separates the thoracic cavity from the abdominal cavity), reach both hands around the top portion of the guts and liver. Pull the guts down and out with one hand while using your knife in the other hand to cut the connective tissue that holds them to the back of the animal’s abdominal cavity. You’ll have to feel your way with the knife’s blade here, all while being careful not to cut your other hand. Determine what tissue to cut by pulling on the guts with your free hand. As you cut, continue pulling the guts and organs until they are completely pulled or rolled out of the body cavity. Finally, cut and trim away any remaining pieces of fascia, fat, guts or organs that you see.
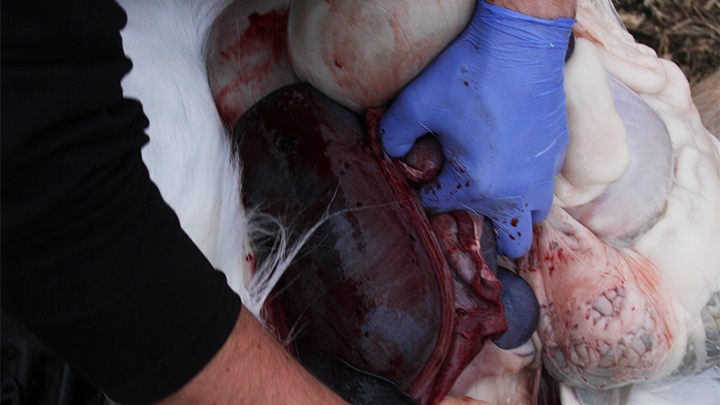
Step 6: While the heart and lungs can be removed to further speed the cooling process and reduce the weight of the carcass for easier transport, the removal of these two organs is optional. They are non-waste-containing organs and will not taint the meat. To most easily remove them, cut through the diaphragm and use a heavy knife or a saw to cut through the sternum so the chest cavity can be spread apart. Then, using your knife in one hand, reach as far up and back into the chest cavity as possible until you can feel and grab the aorta that’s located on the top of the heart. Pull the heart and lungs down and out while cutting the connective tissue (including the aorta and windpipe) all around it until they can be removed.
Step 7: With a partner (if you have one), lift the animal’s front legs off the ground, or roll the animal on its side, so the pooled blood and remaining guts pour out of the animal’s body.
Step 8: If you have fresh, cool water, quickly rinse the body cavity. Note: Just give it a quick rinse; it doesn't have to be completely tidy. If the available water is warm or possibly dirty, such as pond water, skip this step.
Step 9: If you plan on hanging the animal to age the meat, skin it, then place it in a cotton game bag to keep insects off. If you plan to transport it, do not skin it, as its hide will protect it from dust and debris.
Step 10: Cool the carcass as swiftly as possible. If it's cold outside, use a stick to open the animal’s body cavity before hanging the animal in a shady place by its neck, antlers or a rear hock. If it’s warm outside, quickly place the carcass in the shade and, if possible, in a breeze. Placing it on a tarp under a truck (shade and breeze) will do in a pinch until you can get the animal to a cooler location. If transporting in a truck on a warm day, place bags of ice in the animal’s body cavity and create shade for it. However, do not fully wrap the animal in a tarp, as the tarp will trap heat. Get the carcass quartered and in ice-chilled, portable coolers or to a game processor’s freezer as soon as possible.
If you follow these steps, you’ll provide your family with wonderful, wholesome game meat for the table.
Is it Spoiled?
Regardless of the conditions, outside temperature or how long an animal has been dead, there is no set formula for determining if meat is spoiled. The best meter is your nose. If the meat has an awful, rotten smell that turns your nose when you first smell it, it has spoiled or is beginning to spoil. If the meat has no off-putting odor, it is very likely still good. And just because one part of the carcass has spoiled doesn’t necessarily mean all of it has spoiled. For example, meat that was exposed to hot sun may be spoiled when other parts left in the shade may still be fine.
• sharp knife
• headlamp
Bonus Tools to Make the Process Easier, Faster or Cleaner:
• Hunter Specialities Butt-Out tool
• filet knife
• skinning knife
• knife sharpener
• tarp
• running water
• latex gloves
• gambrel and hoist
• bone saw
• electric Sawzall