The rifle in America dates back to our first settlers. Indeed the NRA National Firearms Museum displays a gun that came to our shores aboard the Mayflower. Throughout our history the rifle has shaped our course. It has helped us put food on the table, explore and settle a continent, and defend our homeland.
But as hunters we are primarily interested in its practical use as a tool.Webster’s defines “practical” as: “of, exhibited in, or obtained through practice or action [practical knowledge]; usable; workable; useful and sensible.” To that end, a “practical” hunting rifle is compact, lightweight, powerful and accurate. It wears a short barrel so it comes to shoulder quickly and carries easily in thick cover. Proper weight contributes directly to the balance of the arm, its “feel” between the hands; in a standard caliber a hunting rifle weighs about 71/2 pounds; chambered for dangerous game it weighs about 9. It is chambered to fire a cartridge adequate to hunt all game one wishes to pursue with the arm. It has as much power as needed to dispatch game at your maximum effective range, or to deal with the charge of a dangerous animal. It is capable of delivering 1 MOA accuracy.
You’ll carry your rifle all day, maybe all week. You and your rifle must sometimes traverse severe terrain and suffer through terrible weather. But in the end, you’ll shoot for only a few seconds—and neither of you can fail to function. So it’s important to understand what your rifle represents in your hands. You can appreciate that only if you master your craft.
The Practical Shooter
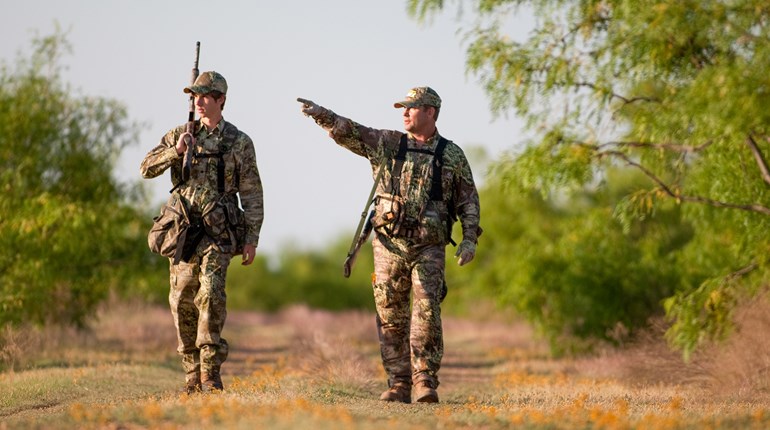
Not all hunters are shooters. Hunters’ average shots on game in the United States are taken at less than a hundred yards, according to surveys by game departments nationwide. What’s more, they often are taken with a rest—a tree, a rock or the cross-bar of a treestand. Shooters, on the other hand, have a firm grasp of the principles of marksmanship. They practice from the prone, sitting, kneeling and standing because they want to regularly test their abilities. They know it’s the human element—not the mechanical one—that is most likely to falter.
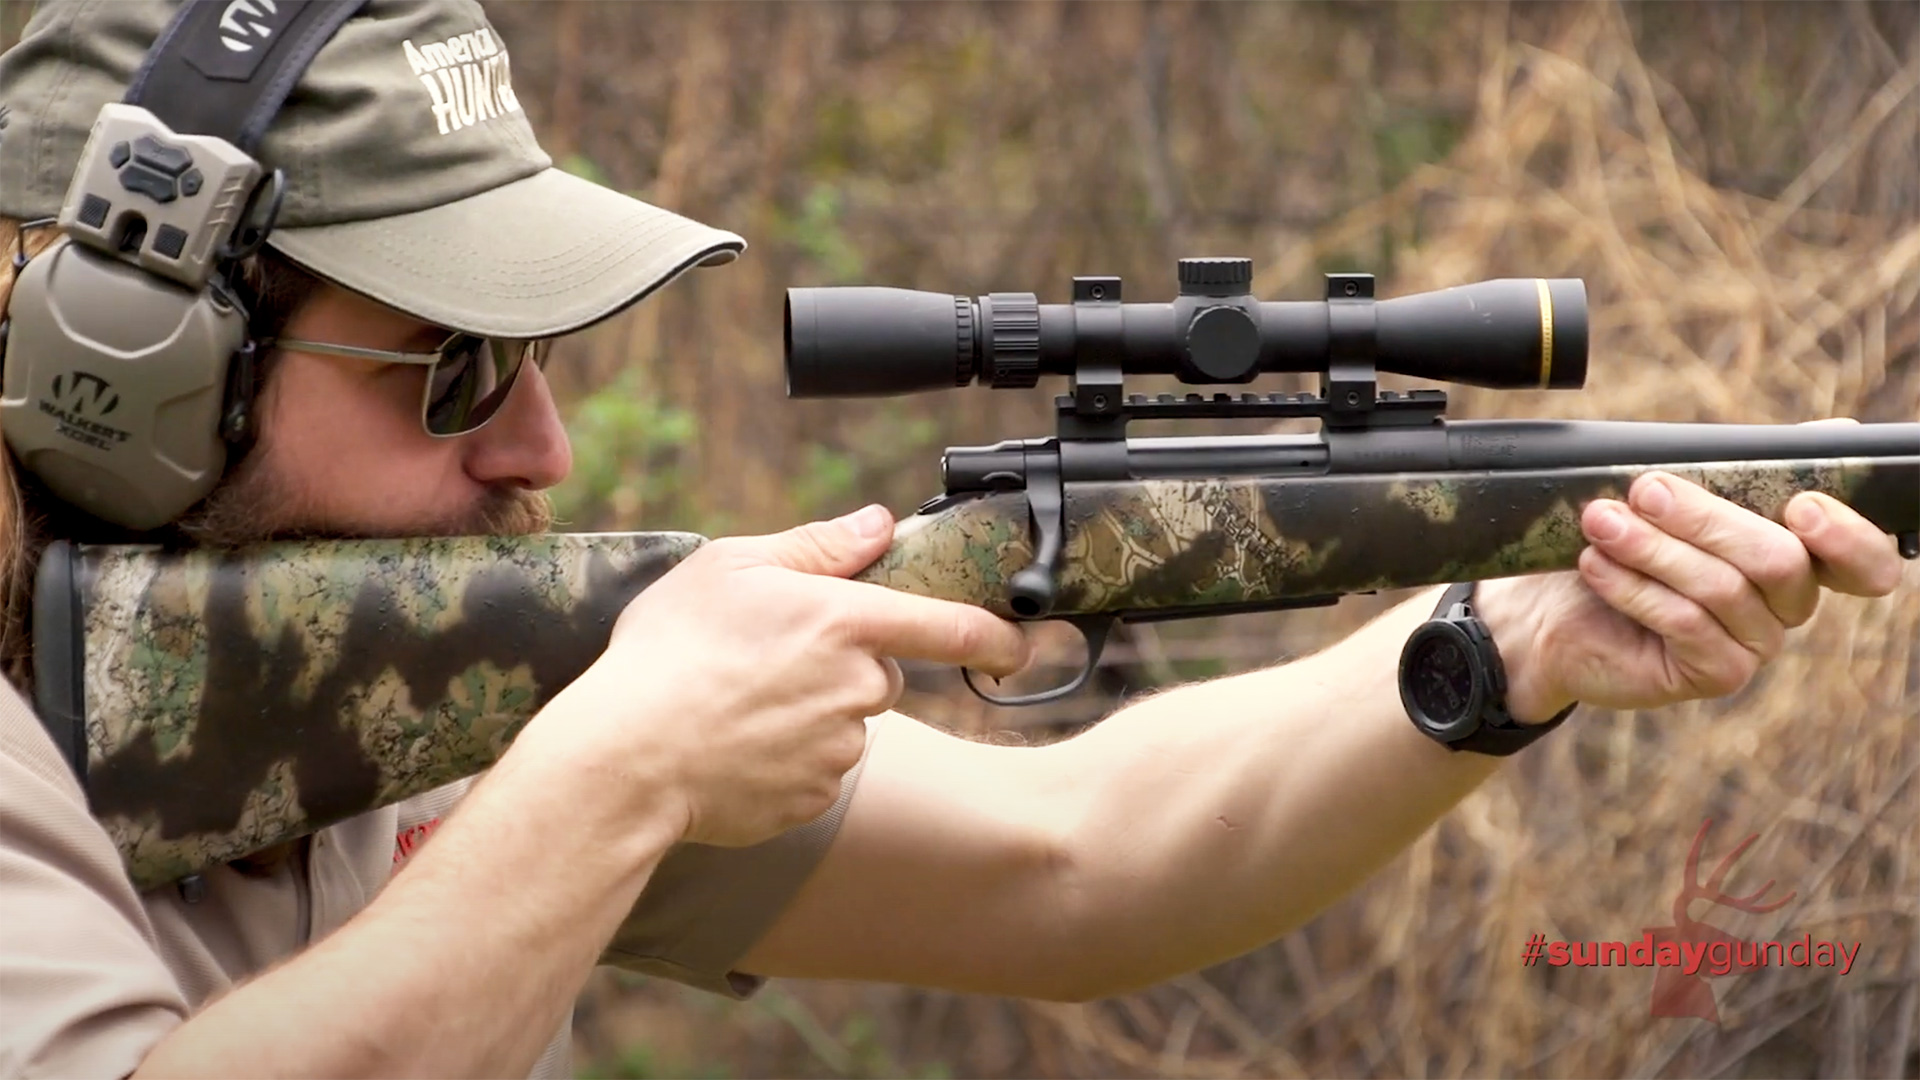
The position you adopt should allow you to hold the rifle in your hands, but support its weight with bones in your arms. Think “muscle on bone.” In the prone, prop your elbows on the ground and support the gun in your hands atop your forearms. In the sitting, prop your elbows in the pockets formed by your bent knees. In the kneeling, place your triceps over your knee cap. Place the web of your left hand snug against the underside of the fore-end, palm facing upward, to ensure your elbow resides underneath the fore-end. Wrap the fingers of your strong hand around the front of the pistol grip, your thumb across the tang. Exert firm rearward pressure on the grip to keep the butt tight against your shoulder. This also eliminates cant (tilting side-to-side) in the rifle, something that can affect accuracy. Pull the buttstock tight into your shoulder pocket to steady the rifle and lessen recoil. A proper stock weld ensures your head and rifle recoil as one, which facilitates rapid recovery and follow-up shots. Raise the butt to your cheek, positioning your eye at the same distance behind the sight every time. Keep your head upright at all times.
Follow procedures for getting into and out of each position step by step and dry-fire from them before ever firing a live round downrange to build confidence in your physical ability, and condition muscles and ligaments to do things they perhaps haven’t done for a long time.
Don’t cut corners. You need to develop mental and muscle memory. When a shot presents itself, you need to know immediately what position will work, and adopt it then and there, with no fuss or change of plan.
The best field-position will provide three points of contact with the ground or a body part that rests on the ground. Two elbows resting on the ground, and one’s torso and legs lying on the ground, for instance, create three points of contact in the prone. Sitting cross-legged with two elbows rested on one’s knees creates three points of contact while sitting.
Overall, remember this rule of thumb: Never stand when you can kneel, never kneel when you can sit, never sit when you can lie down. To know whether to go prone or whether to sit, kneel or stand you must continually assess the ground and your line of sight during a stalk.
“The more you shoot from the various positions, the more your body will know what position to take during a shot or an engagement with game,” says Il Ling New, an instructor at Gunsite Academy in Paulden, Ariz. “It’s muscle memory at work.
“If you cannot maintain your mechanics, you will not maintain good groups at any range,” she says. “At 50 yards we should be spot on. If not, we’re certainly not going to be able to do anything at longer range, say, 200 yards. So start small, start at short range, then build to longer range.”
It’s important to use as little muscle tension as possible to reduce or eliminate muscle fatigue. No matter how much your muscles scream at you don’t move during the shot. But understand our bodies have natural movement to them. We are never completely, perfectly still. You’ll notice wobble. Embrace it, but control it. Wobble is the thing we want to minimize.
Perfect your mechanics by beginning each range session with facing drills, advises Doug Prichard, an instructor at Sportsman’s All-Weather All-Terrain Marksmanship at FTW Ranch in Barksdale, Texas. Face the target, adopt a position, pop the gun to your shoulder and aim at the target. Do this for each position. Dry-fire, or more accurately, dry-practice, is key to muscle memory. Relax, think about the fundamentals of marksmanship and the shooting positions you want to rehearse before loading the gun.
Pay attention to the operation of your rifle’s action. With minimal practice, you can work the bolt and reload the chamber while maintaining any firing position.
Focus intently on the front sight post or reticle as the trigger breaks. Don’t look at or aim at the entire target or animal. “Pick a point on that target, or that animal,” says New. “You can easily reduce group size by simply paying attention to the reticle.”
Targets with vague aiming points help here. Eschew clearly defined grids and bullseyes in lieu of uniform surfaces—a paper grocery bag with a few barely discernible marks on its surface works well. Remember, the game has no grid covering its vital zone, no neon letters that say, “Hit it here.” In the field you must pick a spot, a wrinkle, a patch of hair.
Breathing should be deliberate but natural. Remember to take advantage of the natural respiratory pause.
“As I’m bringing the gun up and taking off the safety,” says Prichard, “I let out that breath. During that natural respiratory pause let out that breath, touch the trigger, take your last breath, let it out and start your trigger squeeze.”
Be sure to squeeze, or press the trigger. Soon a long, deliberate pull should be replaced by a compressed trigger squeeze. Use the middle of the first pad of your index finger. Remember dwell time, that period of time that exists as the bullet travels the length of the barrel: Forget about it and you’ll see poor accuracy downrange. During follow-through, hold pressure on the trigger for an instant after the gun discharges. Then deliberately remove your finger from the trigger and move to operate the bolt.
You can get away with a little trigger smack at short range, but pulling your head out of the scope will always present a problem.
Remember that follow-through is a continuation of shooting fundamentals throughout recoil. Your eyes need to remain on the sight. You must maintain your cheek weld.
After the shot scan and assess the field. Before you move from your shooting position, keep the gun in your shoulder, lower it a bit, engage the safety if you feel the need, run your trigger finger alongside the trigger well and scan the field over top of your scope. Your eyes and gun should move as one: scan left, muzzle moves left; scan right, muzzle moves right. It does little good to notice a developing situation if you are not prepared to shoot.
Now rise. In most cases we will have ample time to casually “break from character” and climb out of whatever contorted pose we’ve adopted for a shot. It’s the times we don’t that should concern us. Rehearse the right way to break position so climbing to your feet and preparing to move or shoot again becomes second nature.
Do not palm the bolt handle upward with an open hand like you might do on the bench. Sweaty hands have a way of slipping off smooth metal. Work the bolt like you own it. Use the thumb and forefinger of your strong hand to grip, or pinch, the bolt handle. Move the bolt in a two-count motion—open and back, forward and closed. The gun should never leave your shoulder; the sights should remain before your eyes.
Decide what you will use to carry ammo; where it will reside; and how you will move your hand between the ammo and the rifle’s chamber or magazine without looking. Practice three kinds of reloads. All of them are begun with an open bolt.
Perform a low load by maintaining a firm hold on the fore-end with your weak hand while lowering the gun to waist level. Keep your eyes on the target. Use your strong hand to acquire one fresh round at a time. Place each one firmly in the magazine well, pushing down on each one to ensure it slips beneath the feed lips. Close the bolt on a fresh round in the chamber as you use both hands to raise the rifle to eye level. Place your finger on the trigger only after your eye finds the target through the scope.
Perform a position load by maintaining a firm hold on the fore-end with the weak hand to maintain pressure on the rifle against your body. Keep the gun in your shoulder, your eyes on the target. Without looking, find your cartridge wallet with your strong hand, and acquire a fresh round. Reach up and place it in the open action, and push down on it to ensure it seats beneath the magazine feed lips. When the magazine is topped off close the bolt and resume shooting.
Perform a tactical load similar to the position load. But instead of loading one cartridge at a time acquire a full load of rounds—enough to top off the magazine in one motion. Without taking your eyes off the target, diligently work to seat each round beneath the magazine feed lips. This takes practice. Loose cartridges don’t always cooperate. But master this method and you can top off an empty magazine and be back in action faster than you ever imagined.
Learn to manage recoil. Buy and use a Past slip-on recoil pad on your shoulder. “Don’t let the gun roll you,” says New. “You need to be in control; don’t let the gun run you or dictate what position you’ll use or how much you’ll shoot during a range session. It’s a matter of pre-programming your body to manage recoil, to minimize the movement during recoil.”
Call your shots. You should have a good idea where your bullet impacts the target before you confirm it with a look downrange. This is easy if your focus resides on the sight when the shot breaks. Before you check point of impact, ask yourself whether you can remember the location of the sight when the gun discharged. Record your called shot in a range data book then compare it to the actual point of impact.
When you start sending live rounds downrange, remember you have a loaded firearm in your hands. The definition of “loaded” is a stoked magazine—a round need not be in the chamber. Muzzle awareness is paramount at all times. When the game is killed or the day ends, unload your rifle completely and tell others you’ve done so. Always keep in mind the first two rules of NRA firearm safety: Always keep the gun pointed in a safe direction; always keep your finger off the trigger until ready to shoot. (The gun will be loaded because it’s in use.)
Prone
Prone is the most stable position you can take, since your torso and legs maintain constant contact with the ground. With each elbow planted firmly, you create three points of contact and what can be a benchrest-solid platform. Terrain or vegetation often rules out the position.
How to Get There—Hold your rifle by the fore-end in your weak hand, and drop to your knees. Fall forward, using your strong hand as a brace. Straighten your legs, spreading them far apart. Lay your heels flat on the ground, toes pointed outward. Plant each elbow on the ground, lift the rifle with your weak hand, and tuck the butt into your shoulder with your strong hand. Keep your support elbow directly beneath the fore-end to provide stability. Now check your natural point of aim. If needed, adjust to it by angling your body slightly toward your strong side. Sometimes prone is too low, but you should always consider it first when choosing a position.
Advanced Tips—The international position provides a slightly higher line of sight and fire. It can also be more comfortable because it alleviates pressure on your chest. To get there, bend your strong-side knee toward your strong-side elbow, and adjust your elbows as needed. This raises your torso, which gives you a better line of sight/fire. Beware: It is a less-stable platform, as your chest will no longer be in contact with the ground.
The Hawkins prone is the lowest of all, but it provides the least clearance over obstacles. To adopt it, make a fist with your support hand around the front sling swivel and rest your fist and the rifle’s buttstock on the ground. Flatten your elbows to either side.
Recovery—Grip the rifle by the fore-end, release it with your strong hand, and use that hand to push up off your chest. The buttstock will rest on the ground. Straighten your strong-side elbow, and when your legs enter the equation, tense their muscles and rock backward to your knees. Swing your weak leg forward and place your foot flat on the ground. Grip the rifle with both hands, and rise to a standing position, stepping forward with your strong-side leg to maintain a balanced stance.
Alternatively, if the terrain and your physical ability enable it, you can rock back farther when rising off your chest, and in one motion rock from your knees all the way back to a flat-footed, squatted position then stand. Keep the rifle in your shoulder and pointed downrange, scan and assess as you rise.
Sitting
Next to prone, the sitting position is the most stable position you can adopt. It’s usually the one most hunters take in the field when they’re not using a rest because it comes naturally. Trouble is, most hunters rarely try it on the range, thinking they can figure it out if the situation dictates. But when they do so in the field, their muscles resist due to inactivity. If you’re over the age of 40 I suggest you practice this one. Considering the vagaries of terrain and vegetation, it presents the most useful tool to a hunter without a rest, but only if one’s body is ready to adopt it.
How to Get There—Stand 45 degrees into your strong side, your weak shoulder facing downrange, and cross your ankles. Holding the rifle in your weak hand, drop to the seat of your pants, using your strong hand to brace your fall, and sit cross-legged. Place your  elbows in the pockets formed by your bent knees. Hold the rifle in your weak hand, and use your strong hand to place the rifle butt in your shoulder pocket. Now scrunch low … lower … sink into position.
Advanced Tips—This is as low as you can go while seated, and next to prone it’s the most stable position. But if you have a “pronounced” midsection you’ll never get here without practice; scrunched as you are, you’ll compress your diaphragm and it’ll be hard to breathe. Practice on the range to stretch muscles and work out joints. If sitting cross-legged presents a problem, plant each foot flat on the ground and rest your triceps on your knee caps. Be careful: This exposes you to twitching knees.
Recovery—If your legs are crossed unfold them and place your feet flat on the ground, knees up. Grip the rifle by the fore-end in your weak hand, and place your strong hand on the ground behind you. Bend your strong leg underneath the tripod formed by your weak leg and your body. Push with your strong hand and rise to your strong knee. With your weak hand still gripping the fore-end, lay your weak elbow over your weak knee, bring the rifle to your shoulder and lean into the kneeling position. Rock forward and rise to the standing position. Keep the rifle shouldered as your rise to the offhand position.
Kneeling
This is my favorite position because it gives me three things: a stable, three-point shooting platform I can reach in an instant, a commanding view of the field and the ability to move quickly should the situation change. With practice over the years, I’ve proven to myself I can be about as accurate in the field from the kneeling as I can from the sitting, mainly because it’s more comfortable for me to adopt. The downside is it’s hard on the knees if you must hold position for a long time. Rmember, kneeling is simply not as stable as prone or sitting.
How to Get There—Hold the rifle in both hands. Face downrange with your feet shoulder-width apart. Step forward with your weak leg and bend at the knee, place your strong knee on the ground, drop onto your strong heel and sit on it. Place your weak-side triceps over your weak-side knee cap. Hold the rifle in your weak hand and place the rifle  butt in your shoulder pocket. Lean forward just a bit, let your weak-side triceps melt into your weak-side knee and let your butt sink onto your strong-side heel.
Advanced Tips—You may also drop your strong-side ankle to the ground and sit on either the outside or inside of it, whichever is comfortable. The problem with the kneeling position is your “chicken wing,” your elbow as it dangles out there unsupported.
Recovery—Rock forward, putting most of your weight on your forward (weak-side) leg. Bend your strong knee inward and forward, rock forward, and rise up on the ball of your strong foot. Rise to a standing position.
Offhand
I call the standing position for hunters the “offhand” position, mainly because it leads to a shot taken rather quickly. It is the least stable, and it should be used only at close range when there is no time for anything else. It can be quite effective. We’re interested in what works for hunters, not what works for competitive shooters. As such, don’t fire from the “blade” position, with your weak-side shoulder pointed downrange, as you would in competition. This will pull your shots right if heavy recoil is a problem. Instead, “square up” to the target.
How to Get There—Hold the rifle in both hands, face downrange and spread your feet shoulder-width apart. Move your strong-side foot back slightly. With your eyes fixed on the target, shoulder the rifle in one smooth motion.
Firmly grasp the fore-end with your weak hand, and with a firm grasp of the pistol grip with your strong hand, use both hands to pull the rifle into your shoulder pocket. Keep your support elbow beneath the fore-end to prevent swaying. This stance will send recoil straight back into your shoulder, and will keep your shots from straying left or right.
Advanced Tips—Always bring the sights to your eyes. Never lower your cheek to find stock weld or field of view through the sights. Don’t drop your head to find the sights as the rifle butt reaches your shoulder. Keep your eyes on the target. With practice, you can reliably engage targets out to about 75 yards in a snap.